Search This Blog

DC23 Clothing

DC23 Clothing
Find Us At Facebook
Showing posts with label snapfitting. Show all posts

Tuesday, December 3, 2019

RG Sazabi Snapfit and Quick Review


RG Sazabi photo

I asked my daughter ( @verashley05 ) to snapfit this Real Grade Sazabi for me earlier today. I initially thought of putting up a review of this kit at my Youtube channel, but then I decided I will just do a modification and painting video instead. We have Dalong and a ton of youtubers who reviews ootb kits already. 

FIRST IMPRESSION

I love RG! I love RG! I love RG! Bandai Real Grades, even the older ones are so nice and detailed for their size. Actually they are nice and detailed even in comparison to a few MGs. This kit is just a little more than 7 inches tall. The size is perfect for a nice diorama setting. 

I have zero plans on creating a diorama for this as of this writing tho. Maybe a nice little base, but I have zero diorama ideas so far. 

DETAILING 

I love details. I love detailing both my dioramas and my drawings. Detail is my middle name. I love the peeking grey parts. The exposed internals on some of the armor parts. I feel it needs more panel lines. More panel lines will be awesome for more two tone armor painting. I will add a few panel lines to help my two tone painting later and maybe a few of my usual armor trimming too. . I will also add my usual holes. No pla plating for me, as I will focus on painting for this build. 

PAINTING

I will paint this kit with Vallejo Mecha Colors ( seen in the pics ). Will paint it reds ( and red oranges ), metallic Mecha color paints for the internals and will weather it too. Will weather with Vallejo Mecha Weathering paints. Should be fun. I will have a video of my whole painting process at my Youtube Channel. 

CONCLUSION

I am Excited to paint and weather this! I am excited to share my painting process in video. I am excited to do Gunpla again! 

Thanks as always for dropping by! 

Until next update guys! Cheers!


SHOUTOUT as usual!

I only use Vallejo Acrylic paints in all my builds - Acrylicos Vallejo

I get some of my tools from HOBBYMATE Singapore - HobbyMate at Facebook

And get my Vallejo paints from Neutral Grounds Philippines - Neutral Grounds Philippines

I only use Harder & Steenbeck for airbrushing - Harder & Steenbeck Airbrush


RG Sazabi photo

RG Sazabi photo

RG Sazabi photo

RG Sazabi photo

RG Sazabi photo

RG Sazabi photo

RG Sazabi photo

Read more >>

Monday, December 2, 2019

SD Zaku and Charagguy Momo snapfit


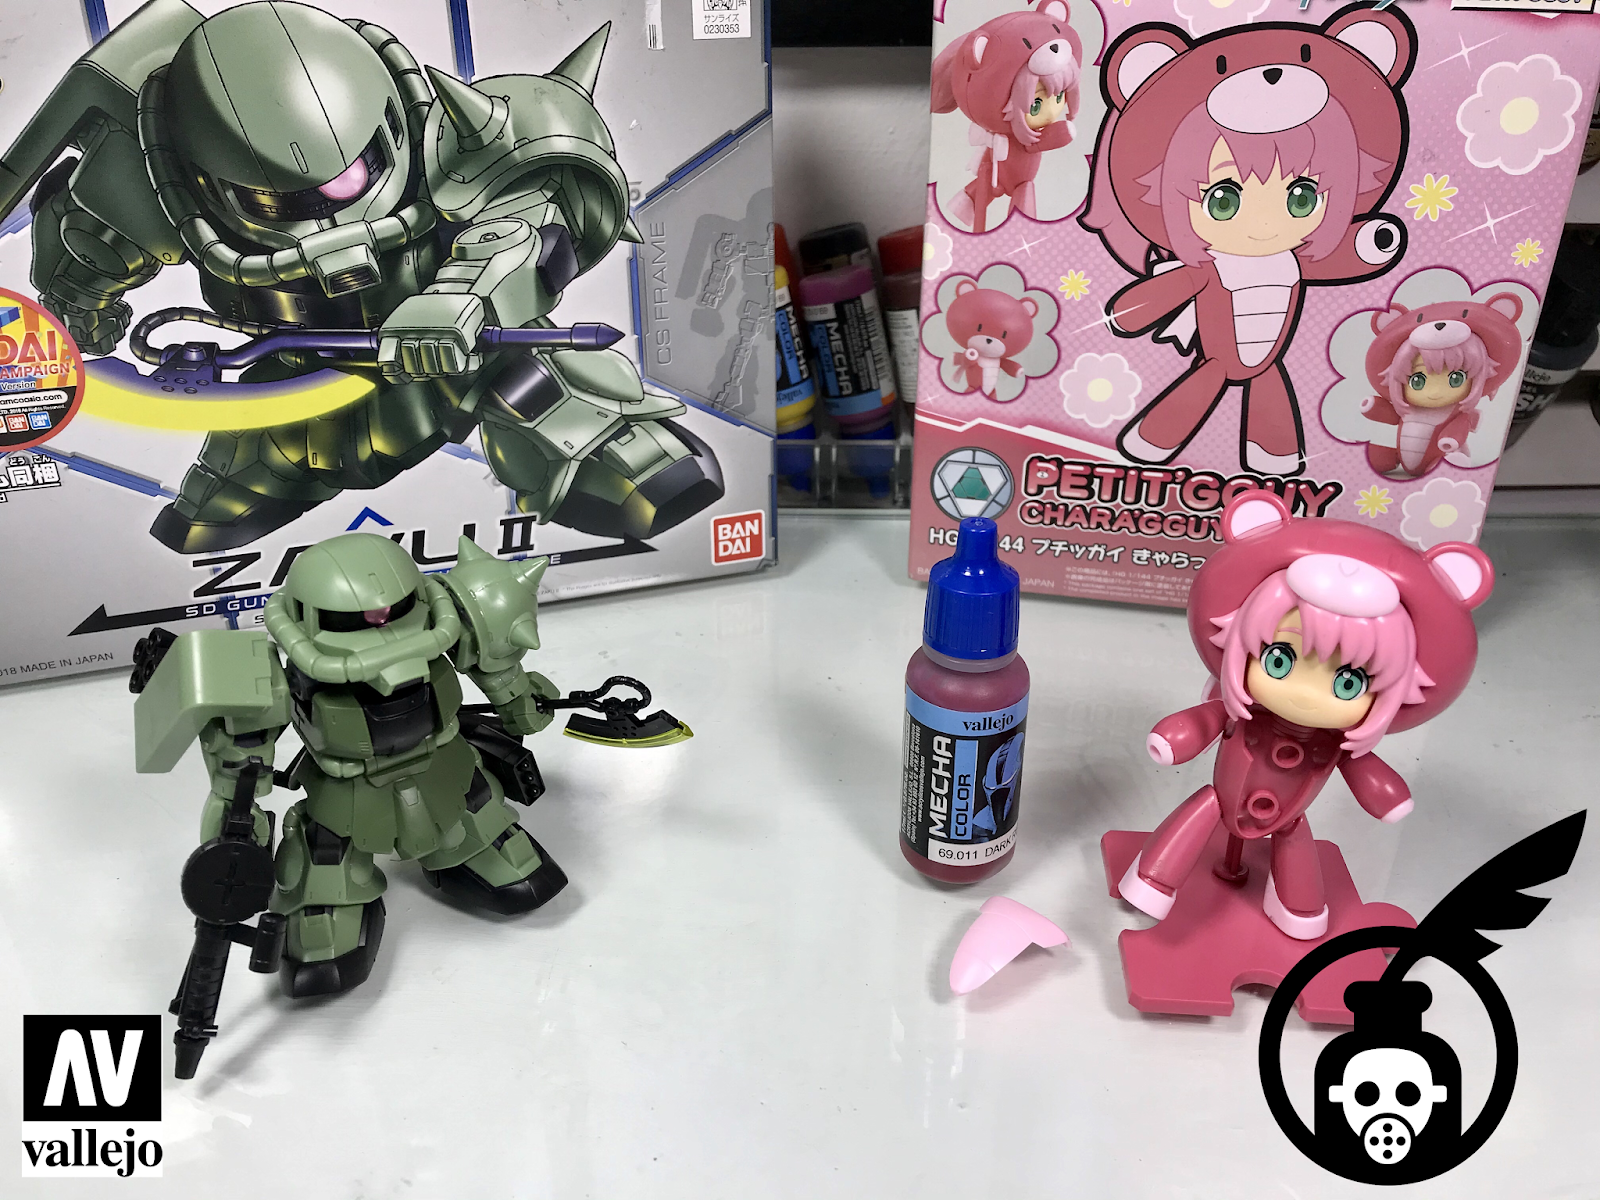
SD Zaku and Charagguy Momo snapfit Photo

I just finished snapfitting these two little Gunpla kits. Actually I applied thin cement on the seam line parts already while assembling. I will wait for the thin cement to fully cure until tomorrow, before sanding it off.

SD Zaku II

The SD Zaku is super nice. It has skeleton of sorts. It was a fun quick build. There are seamlines on the forearms, legs and skirts. I applied thin cement and letting it cure already.

However there are NO seam lines on the gun and bazooka. That was a surprise!

The black chest part, albeit seems hard to pull out is easy to remove. Very good for disassembly once I paint it. Hollow parts are not as obvious as previous SD models. The back of the hands and the missile pods are the only hollow areas of the kit. They are not visible at the front ( which is good, if you don't want to fill the hollow cavities ).

I might add a few rivets or holes here and there before painting. I will paint this SD Zaku with Vallejo Mecha Colors and will weather it like I normally do.

Can't wait for the thin cement to cure, so that I could clean up the nub marks and mold lines.

Charagguy Momo

This cute little pink kit is so... hmmm... cute!

There are no hollow cavities to fill except the ribbon at the back. Bandai also added a wide panel line across the head, so that you do not need to remove a hideous seam line. The hair piece at the back, the legs and the body have seam lines to fix tho. I have applied thin cement on them during assembly already.

Be careful with the pink ear parts and the pink chest part. Do not put them on if you plan to paint them separately. They are a pain to snapfit. Good luck to me if I can still remove the pink part of the ears.

I did not assemble the Beargguy / Petitgguy head, the Beargguy hand and the chair. I have no plans of painting them. I added the "eye" stickers just to see how cute it is. But I will hand paint the eyes during painting.

I plan to paint the onesie body with Silver Pink Vallejo Color Shift Color. This kit will be bling bling once finish. Will paint the hair parts, face, ribbon and eyes with Vallejo Mecha Colors.

That's it! 

That's it! As I've said, I will let the thin cement cure for a day, before sanding the seam lines off. Will also clean the nub marks and add a few rivets / holes on both kits.

Thanks as always for dropping by! Until next update guys!

Cheers!


SHOUTOUT as usual!

I only use Vallejo Acrylic paints in all my builds - Acrylicos Vallejo

I get some of my tools from HOBBYMATE Singapore - HobbyMate at Facebook

And get my Vallejo paints from Neutral Grounds Philippines - Neutral Grounds Philippines

I only use Harder & Steenbeck for airbrushing - Harder & Steenbeck Airbrush


SD Zaku and Charagguy Momo snapfit Photo

SD Zaku and Charagguy Momo snapfit Photo

SD Zaku and Charagguy Momo snapfit Photo

SD Zaku and Charagguy Momo snapfit Photo

SD Zaku and Charagguy Momo snapfit Photo

Read more >>

Friday, December 24, 2010

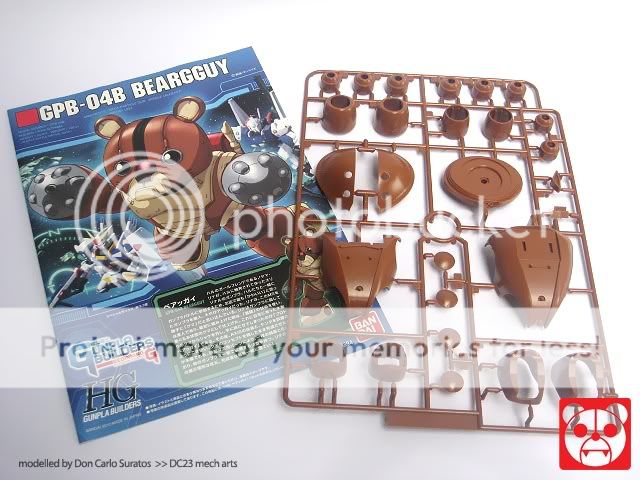
1/144 Beargguy: STEP by STEP assembly


I do not DO snap fit reviews as I find it very time consuming and I am always very anxious to see the model kit finished. I mean I snap fit as fast as I could so that I could play with the kit as early as possible.
However, this kit is an exception coz this will be my entry for our dual forum Group Build!

Gundam Australia Forums and our Mech Arts Community agreed to join forces and do a Beargguy Group Build simultaneously at both forums! 20+ people have pledged to join in this GB at MAC forums already and I will check later if a lot more joined at GAF.

The kit is overly cute, my wife even told me to buy a few more and paint it in different colors. She likes it so much she is urging me to buy more ( LOL ). My wife even played with the articulation of the kit, a first in my 3 years of Gunpla!

The articulation is pretty decent and the color separation excellent. This kit is a bit heavy for its size, it feels really solid like a toy actually. Be careful with the mono eye though as it falls off easily. On the other hand, the arms have really tight joints and the legs have good articulation.

Anyways, here is a STEP by STEP photos while snap fitting this overly cute kit...
Read more >>

Friday, December 18, 2009

SD Gouf custom snapfit


Hello guys, I bought a SD Gouf custom earlier during my office lunch break...I usually eat lunch at a mall near my office which has a hobby shop. Basically I took with me a few bottles of enamel and acrylic paints, but a few SD boxes caught my attention...a SD GP04 ( reminded me of Julius' dendro ), a SD Turn A ( my fav MG kit ) and an SD Gouf custom. I have 4 unpainted SDs in my shelf already...a SD 00, SD MKII, SD Red Astray and SD Tallgeese I...but I really like the SD Gouf coz I only have 1 mono-eye SD which is the SD Geara Doga.

Anyways, I bought it along with the bottles of paint and assembled it after eating dinner. This post will also double as a very simple tutorial on how to properly snapfit a kit if you plan to paint it for a later time.
Here are some pics...

Read more >>

Featured Post

Vallejo Mecha Color EXPLAINED

As usual, pardon for the selfies as I desperately try to get comfortable in front of the camera, for my new YouTube channel .  Le...

TOP POSTS