Search This Blog

DC23 Clothing

DC23 Clothing
Find Us At Facebook
Showing posts with label dio painting. Show all posts

Thursday, December 18, 2014

Full Styrene Custom Base and Texturing with Paints


Full Styrene Custom Base and Texturing with Paintsphoto

I wanted to do a quick project that would help me focus on painting and weathering so I decided to pull out an old unfinished project and crafted a quick base using styrene. As I've said in my previous post HERE, I am trying to improve my bases and the overall presentation of my builds. I want my build to look like sculptures.

I basically used my old 1/48 Zaku and removed most of it's limbs. I will need to detail up and add battle damage effects on the kit before painting. But painting and weathering of this project should be fun as I am working on a 1/48 scale. Meaning rust streaks and paint and armor chippings are very much visible unlike on 1/100 kits.

Full Styrene Custom Base and Texturing with Paintsphoto

Full Styrene Custom Base and Texturing with Paintsphoto

Full Styrene Custom Base and Texturing with Paintsphoto

Full Styrene Custom Base and Texturing with Paintsphoto

Full Styrene Custom Base and Texturing with Paintsphoto

After setting up the pose of the limb-less kit, I then started painting the ground work. As is obvious with the photos above, the ground work and the whole base is made entirely of styrene. I used PU reducer to melt all those styrene chips together.

I am using the paints to create rough texture and not "paint" the ground work. After the modifications on the kit, I will be re-priming the whole thing using Vallejo Surface Primer ( Black ). I want to show everyone how I quickly added texture to the smooth surface of the styrene ground work with paints. I left this curing earlier today and should be nice and hard once I get home from work.

I basically hand brushed 2 coats of Vallejo Grey Primer. It surprisingly dried after around 30 minutes and dried smooth. Weird as I was not careful and just applied the primer thickly. Apparently the Grey primer has some sort of self-leveling properties.

Full Styrene Custom Base and Texturing with Paintsphoto

I think but I am not sure, the Vallejo Acrylic Studio are the cheapest paints from Vallejo. This huge bottle only costs around 8 small bottles of Vallejo Model Color. Such a bargain for a paint this much. I was expecting lesser quality in terms of opacity from this paint. However the photos shows just a couple of coats which reveals that it is very opaque! Pretty high pigment count for it's price range.

I do think lighter colors of the Vallejo Acrylic Studio are not as opaque. As lighter colors tend to be more transparent and requires more coats of paint to fully cover the surface.

Full Styrene Custom Base and Texturing with Paintsphoto

Full Styrene Custom Base and Texturing with Paintsphoto

I did not let the Vallejo Acrylic Studio to dry at all... I immediately dabbed some Vallejo texture paint ( Oxid Paste ) to the surface. Resulting to some blending of textures and colors. I honestly need some Vallejo Black Lava texture paints as that paint has heavier or has a rougher texture. Adding a bit of Black Lava paint should give more variation to the texture.

Full Styrene Custom Base and Texturing with Paintsphoto

Full Styrene Custom Base and Texturing with Paintsphoto

This will dry to a nice rubbery - plasticky material and once you dabbed more paint or texture paint, you will be producing a rougher texture. The textures shown on the photo were hand painted on a very smooth ( primed ) styrene ground work. So painting over this surface should produce a rougher texture.

I then need to modify the kit and add battle damaged effects soon. Once I finished working on the kit, I could then re-prime the whole piece and start the actual painting. As I've said, I used the paints above to create the basic texture of the ground work and not to paint the kit. Stay tuned and you'll see updates of the results soon!

Last tip with dabbing paints and using texture paints... make sure you use really old OR really cheap brushes as texture paints ( much more dabbing texture paints ) will ruin your brushes. Ruins brushes much more than dry-brushing actually.

Thanks as always for dropping by! Until next post guys! Just enjoy the hobby! :)

Full Styrene Custom Base and Texturing with Paintsphoto

Full Styrene Custom Base and Texturing with Paintsphoto
Read more >>

Tuesday, April 8, 2014

RG Zaku Diorama WIP040814


RG Zaku Diorama WIP photo

I thought my recent WIP post about this project would be my last post.

But I got a few suggestions from readers and a commenter that would improve the project. And because I love my readers and followers ( and their suggestions made so much sense ), I had to address them.

First off, I had to break the hangar extrusion at the left side of the diorama. A follower told me it is sticking out like a sore thumb. The angle was bad and it does not make much sense ( see how it looks like HERE ), so I broke it and cut it into half. Now it looks better overall. The hangar extrusion is blending with the theme a little better.

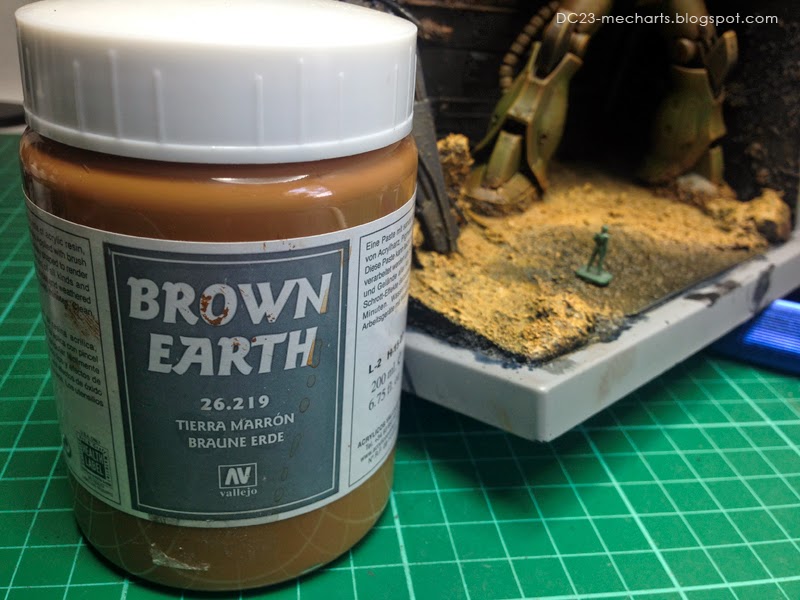
A friend veteran modeler PMed me about the rough texture of the diorama. I used the Vallejo Black Lava texture paint and it looks too rough for 1/144 scale. So I decided to paint over the old ground work and smoothen out the texture a little bit. I used Vallejo Brown Earth texture paint to reduce the profile of the ground work. Now it looks better on 1/144.

Lastly, a commenter suggested that I need to add more debris or weathering on the shield part as it looks too clean. Addressed that by painting over some Black lava paint. I will have to redo all the dry brushing and washes on these parts to blend them with the previous painted parts.

All the suggestions should help make the build look better once done. So thank you for the suggestions guys!

RG Zaku Diorama WIP photo

RG Zaku Diorama WIP photo
 RG Zaku Diorama WIP photo

RG Zaku Diorama WIP photo

RG Zaku Diorama WIP photo

I painted over some Water Effects paint earlier today... you need to let it dry for 24 hours, but I hope it looks better once I get home from work today. The Water Effects paint will dry into a transparent rubber-like surface. The diorama is shaping up already and I hope to finish it soon! Thanks as always for dropping by! Until next post guys! Just enjoy the hobby! :)


Read more >>

Sunday, April 6, 2014

RG Zaku Diorama WIP040614


My Zaku diorama painting sesion today was cut short as I had to drive my pregnant sister in law to the hospital. Currently waiting if she is going to deliver her baby now.

I thought coming out of retirement is going to be easy! But dang I paint so slow these days. So many layers of washes and dry brushing just to get it to look how I want. I am hand painting this project wholly with Vallejo paints and washes. I am having so much fun eventhough I am kinda slow.

I think I am about halfway done painting this project, so this would be my last WIP for this RG Zaku diorama. Hope this project is done by next weekend ( as I do not have time to do Gunpla on weekdays ). 


I like how my RG Zaku is looking so far and this project made me more excited with my 1/48 Zaku hangar diorama. I could apply more weathering techniques because of the larger scale. Woot! 

Anyways, thanks a ton for dropping by! Until next post guys! Just enjoy the hobby! :)


Read more >>

Wednesday, February 12, 2014

Ebasenet Gundam Head Display Groupbuild Gallery


I am trying to catch up with what are the ins and outs of the Gunpla Community for the past few hours and I just saw that the Ebasenet Gundam Head Display Groupbuild Gallery has now been set up! It is such an honor to be in the Ebasenet website! Thank You Masters!

I know this is old news already, but I have been away for a while and have been inactive in forums and the community for such a looooooong time already. Obviously I was inactive already before this gallery has been set up by the Gunpla masters of Ebasenet. 

Construction of my house should be done by the end of the month ( February ) and I am slowly getting excited in setting up a corner for this wonderful hobby! Will check my old tools if they are still in working condition and will get supplies for my first build very soon! Can't wait to get back!

Below is the link of my own gallery at Ebasenet... Do check it out if you have the time. :b 

Turn A head diorama verDC23 @ Ebasenet

Pardon for wasting your time! Just got really excited after seeing the gallery of my Turn V Gundam at Ebasenet. Thanks for dropping by! Until a better post guys! Just enjoy the hobby! 


Read more >>

Friday, February 7, 2014

Katipunan Diorama Commission Work


  KatipunanDioramaPhoto

Hi Guys! I am killing time at work as I just finished my reports, so I thought I'd share my latest ( sort of ) work. 

I did this sometime October last year ( 2013 ). This is basically a diorama depicting the life events of one of our National Heroes ( Andres Bonifacio - Philippines ). This was shot ( with cameras and lightes ) for a series of promotional plugs for the special TV series of Andres Bonifacio in one of the channels here.

It is rough... but that was the idea. The client gave me a couple of weekends to work on this project and I must say that I barely pulled it off! I finished painting some of the parts of the diorama in the same morning when it was shot. Some details was done during the actual video shoot by a good friend and fellow local scale modeler in Arthur Gavino.

I decided to use just papers and cardboard stuffs to speed up the construction and I painted the whole shebang using all Vallejo Acrylic Paints. Those paints ( though a tad expensive ) are a blessing from above. The coverage of Vallejo paints is just so remarkable. 

I had to resort to actually sculpting custom 2 inch sized figures for the diorama. I used copper wires for the frames and GREEN STUFF for the flesh ( and clothes ). Nothing special, but considering I only had a day to create 23 figures, I think I did okay. Pretty fun but really tedious work.

Hope you like this post although it's nothing special. The project ( commission work ) was extraordinary as it is rare that clients would shoot miniatures for commercials rather than computer animation. Pretty rad experience and pretty good pay too! 

Thanks for dropping by! Until next post guys! Just enjoy the hobby!

KatipunanDioramaPhoto 


KatipunanDioramaPhoto

KatipunanDioramaPhoto

KatipunanDioramaPhoto

KatipunanDioramaPhoto

KatipunanDioramaPhoto

KatipunanDioramaPhoto

KatipunanDioramaPhoto

KatipunanDioramaPhoto

KatipunanDioramaPhoto

KatipunanDioramaPhoto

KatipunanDioramaPhoto

KatipunanDioramaPhoto

KatipunanDioramaPhoto

KatipunanDioramaPhoto

KatipunanDioramaPhoto

KatipunanDioramaPhoto

KatipunanDioramaPhoto

KatipunanDioramaPhoto

KatipunanDioramaPhoto

KatipunanDioramaPhoto

KatipunanDioramaPhoto

Read more >>

Featured Post

Vallejo Mecha Color EXPLAINED

As usual, pardon for the selfies as I desperately try to get comfortable in front of the camera, for my new YouTube channel .  Le...

TOP POSTS