Ello guys, The photo at the top shows an average size of the pla plates I used for this build...I had to resize my pla plate patterns to fit the 144 scale, coz I only have patterns for 1/100s... Anyways, I detailed the hguc Geara Zulu further...basically I added more MSG ( koto ) option parts, more small pla plating, drilled holes and scribed a few more panel lines. As I've said in my previous posts, this is but a test / practice build to get accustomed to small scales so that it will be easy for me to detail the AC White Glint. I think I am comfortable working on this scale so now I can move on to my commission work. However for some reason, I suddenly felt the urge to finish this, paint it and create a small base for it at the same time. I will create a small base first after posting this...so stay tuned. hihi, anyways here are some pics...
I use Tamiya Thin cement for gluing all the Koto parts and the pla plates...
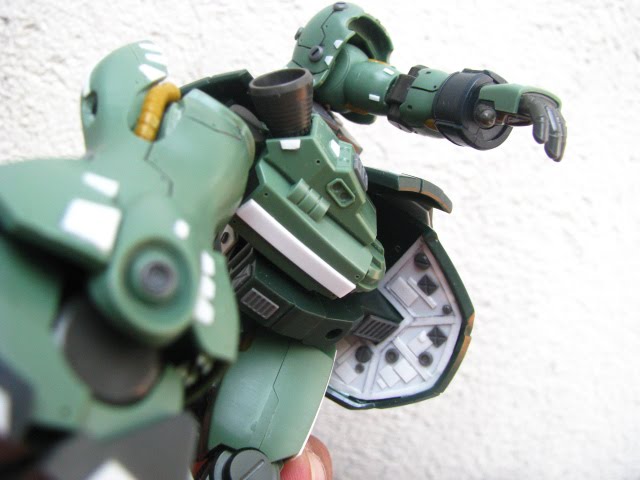
Added detailing to the inside part of the rear skirt, because this part is fairly visible in flight mode...plus it looks ugly in ootb, coz all the holes I drilled from the outside is showing through.
I was lazy to fill the belt that holds the xtra weapons with putty, so I just covered the hollow part with a .3 mm pla plate.
I gave the panel lines some rough wash of india ink, it shows me if I need to further detail the kit...some smudges are visible on the panel line wash, coz I just rubbed the excess off with my finger.
I know that the left shoulder armor should be a one-piece armor, much like the Zakus...but I really can't stand it's bareness. so I scribed a few panel lines for detail thus giving it a segmented armor look. Sorry Zaku fans. ;)
The head cavity is so small I dod not dare SB a monoeye ( hguc Zaku mono eye mods )...so I just glued a half round koto part over the flat mono eye. looks better than ootb of course. ;)
These are pics of the final pose that I plan to give this kit...this is the very reason why I had to detail the inside part of the rear skirt armor, coz it is fairly visible in this pose.
The front skirt was originally a one piece part, I sawed the front skirt in the middle to allow movement independently for the final pose.


9 comments:
Woah making good progress ^^ Takes for sharing the tip on using thin cement to glue the parts. At least no spillage. I love using the koto parts for the monoeye, makes it stand out more.
Just nice hehe, I am also working on Gear Zulu now I have a great reference source :D
Thanks bro, I just did a simple base, will let it dry overnight and paint it tomorrow, will post tomorrow too. hihi, I did not know you are doing a Geara Zulu...will peep at your build then. ;)
the kit is coming allong great cant w8 to see it painted and see what type of base you do. as a huge zaku fan i do find it strange that the shoulder armer is in peases it just wouldnt hold up. but it looks great and its not like its going to war anyway
Thanks bro...Agree, Zaku fans will kill me with what I did with the left shoulder armor, but I really cant let it bare as it is. I t does not matter anyways, mass produced mechs like this always explodes with one hit in the anime.haha
Hey I was thinkin about. I know how how you can make it up to me and the rest if the zaku fans for seperayimg the sholder armor. Get three strips of pla plate and put them in a shape to fit in the armor and conect them by adding two downwerd strips kinda like the 2.0 frame
I don't think it would be to hard but it's pointles unles the armer pulls out
Sorry bro...can't understand what you are saying? thanks for the tip anyways. ;)
I was saying that I was thinking about the seperations in the sholder armor and how you could make seperations hold up if you want to be realistic.
I'll draw something up real quik 2moro after school, scan it and send you a link, can you post links on comments?
I'm not sure if you could post links...but drawings would be great appreciated, but I think I'm kinda getting it now. ;)
Hello, there are many holes close to the panels lines... how did you add them... sorry noob here.
Salamat
Post a Comment