

UPDATE 04-01-10 : painting the base color...
Ello guys, I just finished painting the base color of the Brutishdog and also added some soot / burnt armor effects with Tamiya smoke. The base color has subtle shading and as you will see in the photos, I have added some damage effects to the surface of the armor. The shoulder and knee armors has a cast iron effect on it and the metallic parts also has some shading.
I used Tamiya acrylics as usual and used Tamiya dark yellow for the major armor parts...I used Tamiya brown on the backpack and the visor armor and used Tamiya metallic grey with mist coat of flat aluminum and Tamiya smoke for the internals. I have been painting since 9 am today and just finished around 3 pm.
I will weather the kit further with enamel washes and a bit of drybrushing on the edges...but before weathering I will put on some water slide decals that came with the kit...I think this is the only Bandai kit that I have that came with its own water slide decals. Now here are some pics during assembly...
Internals and the gatling gun was painted with Tamiya metallic grey, with flat aluminum highlights and shading with Tamiya smoke...


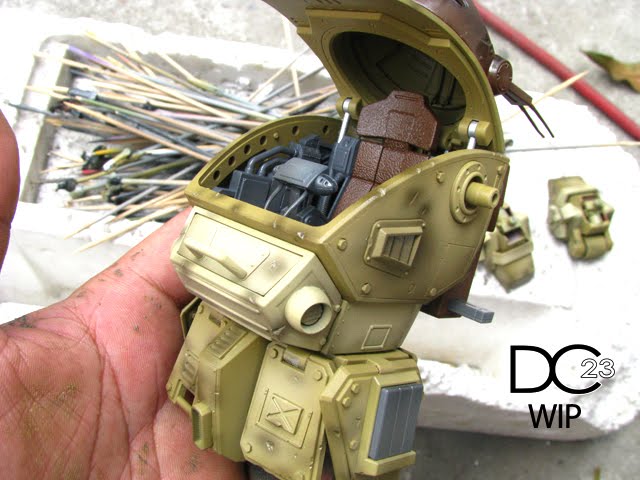
Cockpit internals where painted Tamiya dark grey with light grey highlights and Tamiya smoke shading...


I have yet to paint the visor lens...


Notice in the pic below that the internal side of the torso armor is darker...I did not paint it a different color, I just gave the inside parts some mist coat of Tamiya smoke...making it darker.

I used a Gundam marker to paint the damages...will give the whole kit some enamel washes to blend the markers to the surface a little more...


I am still undecided on the color of the hangar, I just used an old 1 year old industrial spray can to see how it looks like in yellow...I might paint the wall and the floor gray but stick to the yellow tubes...hope it looks better after I've added some rust effects and some shading...


No comments:
Post a Comment