Search This Blog

DC23 Clothing

DC23 Clothing
Find Us At Facebook
Showing posts with label other mechs. Show all posts

Thursday, April 11, 2013

Custom Ma.K Fauz verDC23


 MaK Fauz photo

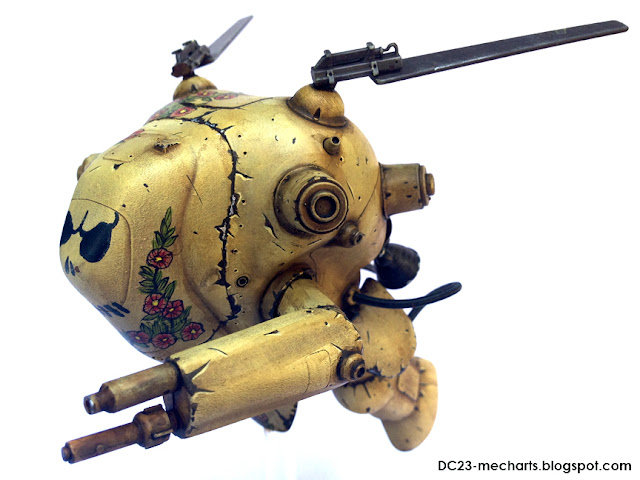
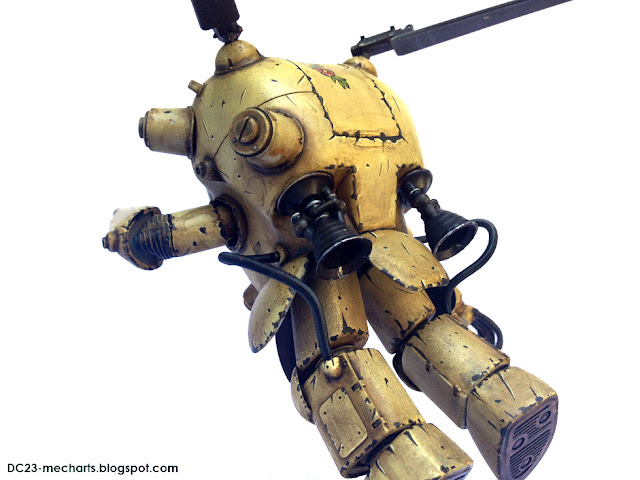
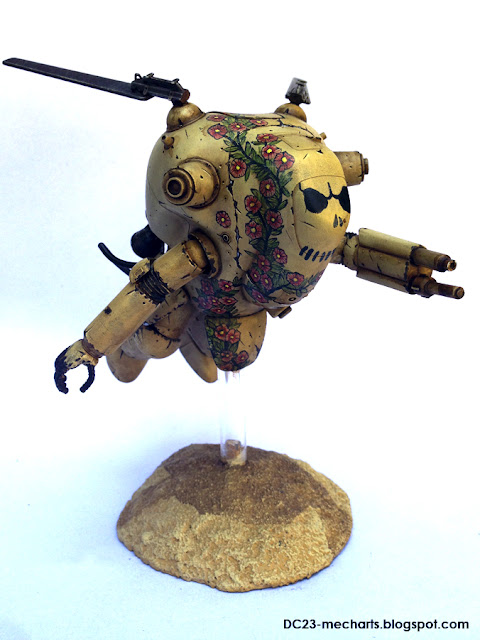
I am so glad to present to you my very first completed build / kit in more than a year! It has been so long since I last enjoyed and worked on a plastic kit and I enjoyed this quick build very much. This Ma.K Fauz kit was a gift from Kenny Lim ( Toymaker ) and company back when they visited the party of our old MAC forums ( 2011 ).

I added a few Kotobukiya option parts on some areas and re-scribed the existing panel lines. Other than the very minor modifications, I did nothing fancy with the base model kit.

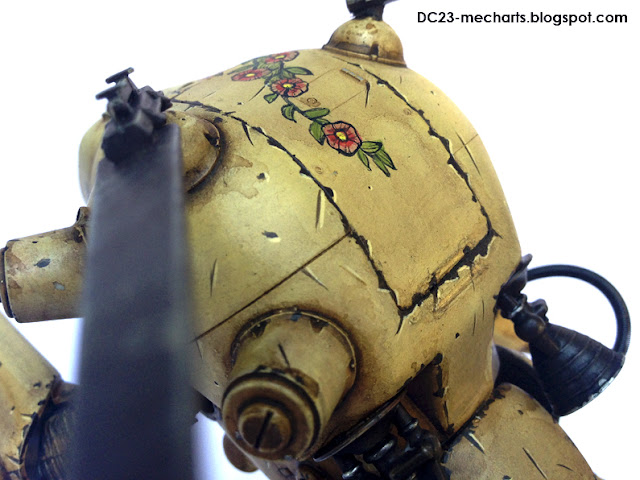
This kit was entirely hand painted with all Vallejos. The base color was done using Vallejo Extra Opaque, Vallejo Game Color and Model Color for the other colors and Vallejo Inks and Washes for the washes.

The highlight of the build is the Floral ( Cherry Blossoms ) hand painting. All photos were taken with my trusty little iPhone5. :)

MaK Fauz photo

MaK Fauz photo
 
MaK Fauz photo

MaK Fauz photo

MaK Fauz photo

MaK Fauz photo

MaK Fauz photo

MaK Fauz photo

MaK Fauz photo

MaK Fauz photo
 
MaK Fauz photo

MaK Fauz photo

MaK Fauz photo

MaK Fauz photo

MaK Fauz photo

MaK Fauz photo
Read more >>

Monday, July 23, 2012

Jaguar WIP by Aor_or_die


Jaguar WIP by Aor_or_die photo

I saw this scratch built monster in person, when good old friend OMAR aka Aor_or_die of Spain went here to the Philippines a while back. He showed us the unpainted casts of this monster of a build. Do check out the photos of this build when I saw it up close back then... LINK HERE.

This post is still the Work in Progress of this masterpiece. I am pretty sure we will still be awed once Omar reveals such a great inspiring work.

Jaguar WIP by Aor_or_die photo

Jaguar WIP by Aor_or_die photo
Read more >>

Wednesday, November 16, 2011

1/60 Broken Blade Eltemus modeled by Mr.GAV


Broken Blade Eltemus modeled by Mr.GAV photo

I have here a very nice weathered Mecha kit of a Broken Blade Eltemus modeled by MAC forums member Mr.GAV. Mr.GAV is the Champion of our Straight Build category in the Europe Gunpla Cup with his stunning MG Sinanju! This is his first time to weather a mecha model kit thus he is being too hard with himself.

Contrary to what he is saying, I think he did a beautiful job on the weathering of the kit. The paint chipping could be a little bit too big or out of scale, but nevertheless it looks stunning! I would not mind having this yellow weathered mecha in my Gunpla shelf. Anyways a ton more photos of this build inside our MAC forums as usual. Here is the link guys!


Read more >>

Wednesday, September 14, 2011

1/20 Maschinen Krieger KAUZ 3Q model: UNBOXING


MaK KAUZ 3Q model Photos

Honestly I have no idea on what to call this model kit. Lots of names in the box that got me confused. Anyways I called it 1/20 Maschinen Krieger KAUZ 3Q model and I hope I got it right. This kit is very special to me as this is my first Ma.K. model kit and it was given to me by our friends from Singapore.

I always wanted this kit since I saw a similar one from Julius Lim. This should be a really fun painting build as I always like my kits weathered and sort of realistic. Not much a fan of anime and not much a fun of military model kits as well, so this kit being sort of a mixture of both should be extra special.

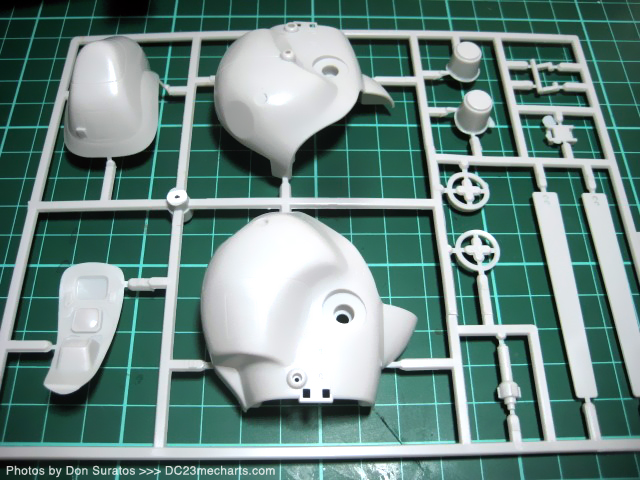
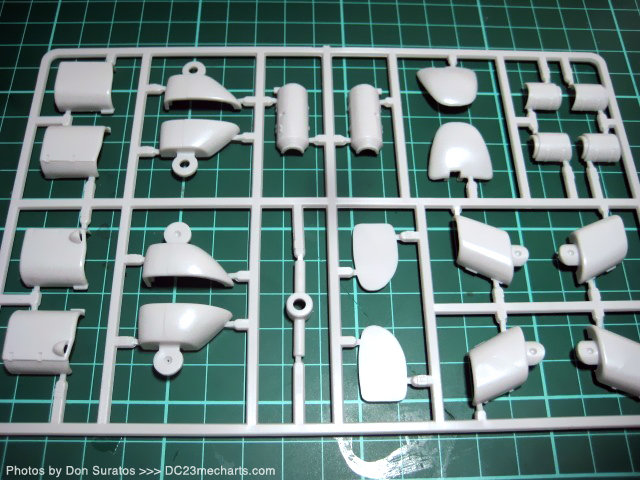
I do not want to do a quick snap fit so I just want to share the kit when unboxed. The kit has 4 major runners and a couple small ones. The kit also includes a couple of water slide decals which should be difficult to apply on those very curve surfaces. It also has some wave springs, assembly manual and decal instruction board.

I love the box as it gives a more serious modeler look to it than the colorful Gunpla kiddie boxes. Anyways, hope you find my first unboxing post as a simple guide if you plan a Maschinen Krieger 3Q model. Now here are some photos of the unboxing...

MaK KAUZ 3Q model Photos

MaK KAUZ 3Q model Photos

MaK KAUZ 3Q model Photos

MaK KAUZ 3Q model Photos

MaK KAUZ 3Q model Photos

MaK KAUZ 3Q model Photos

MaK KAUZ 3Q model Photos

MaK KAUZ 3Q model Photos

MaK KAUZ 3Q model Photos

MaK KAUZ 3Q model Photos


MaK KAUZ 3Q model Photos

MaK KAUZ 3Q model Photos

MaK KAUZ 3Q model Photos

MaK KAUZ 3Q model Photos

MaK KAUZ 3Q model Photos

Thank you for visiting this website! If you are not much of a blog surfer, you could LIKE us at Facebook for blog updates and some photos. Thanks for visiting, til' next post guys! :)


Read more >>

Thursday, April 15, 2010

Astroboy movie toy


Ello guys, I just want to share photos of an Astroboy movie toy that I got dirt cheap yesterday. This toy originally retailed at 800 Php, went down to 400 Php after the movie and is now at 200 Php. Nice! This pretty much has the look and feel of a mighty muggs though it is smaller, it stands at 5 1/2 inches tall and has 4 points of articulation. It has articulation on the neck, arms and waist and has a really solid feel to it.

The toy is basically a deformed cuter version of the CGi character of the movie. I am not really into the movie, but my 3 kids love it. I would not buy the other toys though, coz they simply does not look like the classic series that I grew up watching...I like this deformed rendition of it though, coz it pretty much resembles the classic look of Astroboy ( somehow ?! ).
Read more >>

Friday, April 2, 2010

1/20 Votoms Brutishdog verDC23


Ello guys, I finished this around 6 pm today and I have been taking photos and cleaning the photos in photoshop since then. The bad news is that while I was spraying the final flat coat on the Torso and waist area...the clip slipped and the parts fell roughly 3 feet above the ground. The left side skirt armor broke off from the waist and one of the antennae also broke. This made me skip detail painting the figure that is suppose to sit inside the cockpit ( though I painted it oledi ).

Anyways, I can't find the piece of plasttis that is holding the side skirt to the waist part...so I figured to just let it be... besides, this is a hangar diorama. I then decided to remove the backpack and place both the backpack and the side skirt at the background...making it look like that it is under repair of some sort.

Another thing is that I enjoyed the photography style that I did with the hguc Geara Zulu. The lighting set up for the Geara is a two lights set up only, giving the subject lots of contrast and lots of shadows on one side...But I eventually played with the lighting of this one even more. I figured that a stylized moody lighting would make this kit look more interesting than taking photos of it as I would my other Gundams ( well lit - outdoor shot style ). Anyways here are some pics with the same two lights set up as the hguc Geara Zulu...
Read more >>

1/20 Votoms Brutishdog WIP part V


UPDATE 04-02-10: enamel washes for a more weathered look

Ello guys, I did some enamel wash last night, I uses Tamiya flat brown initially but ran out of it...so I used a really thin enamel wash of Flat black over the flat brown. Unlike Gundams wherein I just ran the enamel wash through the panel lines and crevices...I practically soaked this one with the enamel wash and cleaned it with my shirt and some cotton swabs after. i intentionally did not clean up the enamels thoroughly to give it a more in service and gritty look. The kit is still in gloss coat ( future ) and will be adding decals today.

TIP: I did not do decals before enamel washes like this coz after decalling I would then have to recoat it with future before the enamel washes, plus I was afraid that the edges of the decals might show through more after the washes...The problem with washes first before decals is that I would have to blend the decals later with some pastel work and drybrushing coz it will be too clean and would not compliment the rough gritty finishing of the mech. Anyways here are some pics...
Read more >>

Thursday, April 1, 2010

1/20 Votoms Brutishdog WIP part IV


UPDATE 04-01-10 : painting the base color...

Ello guys, I just finished painting the base color of the Brutishdog and also added some soot / burnt armor effects with Tamiya smoke. The base color has subtle shading and as you will see in the photos, I have added some damage effects to the surface of the armor. The shoulder and knee armors has a cast iron effect on it and the metallic parts also has some shading.

I used Tamiya acrylics as usual and used Tamiya dark yellow for the major armor parts...I used Tamiya brown on the backpack and the visor armor and used Tamiya metallic grey with mist coat of flat aluminum and Tamiya smoke for the internals. I have been painting since 9 am today and just finished around 3 pm.

I will weather the kit further with enamel washes and a bit of drybrushing on the edges...but before weathering I will put on some water slide decals that came with the kit...I think this is the only Bandai kit that I have that came with its own water slide decals. Now here are some pics during assembly...
Read more >>

Monday, March 29, 2010

1/20 Votoms Brutishdog WIP part III


UPDATE 03-29-10 : simple detailing mods...

Ello guys, it's been a while since I worked on this project...I have it hanged on my wall for sometime now. Anyways, I suddenly had the mood to work on it the other day. I basically added tons of Balloon sticks on the wall mounted diorama and primed it red...it looks good so far, not sure though if I want to add more details to it and what color to paint it.

 The hangar dio is my first time, but I would want to create one for a 1/100 Gundam. I also added a few koto parts detailing on the kit itself, just to break some really large plain surfaces. I also added a few square 1mm pla plates on a few areas specially the upper arms to make it look a bit thicker. I will add some minor damage effects all over the kit and will put cast iron effects on both shoulder armors...this build will be weathered like a tank basically.

Sorry for the quality of the pics, coz both semi pro and point and shoot Canon cameras that I usually use are not with me right now...so I just used my cellphone for the pictures. Now here are some pics...
Read more >>

Thursday, January 14, 2010

What I bought today

Hello guys, I was having trouble looking for the AC " white glint " here in the Philippines, so the only option was to buy it online...I did not want to buy it online, simply coz I have not done that before...so the client and me agreed that he buys it for me online and ship it to my address, in return I added a Vanguard Overed Boost to the AC " white glint " commission work....so, I bought it today during my lunch break...here are some lousy pics...


Read more >>

Thursday, January 7, 2010

1/20 Votoms Brutishdog WIP

Hello guys, I have a new personal project...I have snapfitted this kit exactly a year ago and it has been sitting in my display cabinet collecting dust. I have two commission works in the pipeline so this will just be a side project. I plan to do simple pla plating with this kit to make it look more " garage - looking " or simply a mech put together in a garage...making it more lowtech and industrial. Of course I will do a custom dio for this, but I am not yet decided on what scene I will produce for the kit. Anyways, here are some lousy pics I just took so that you could see the nice details of the kit...

The box art, I copied the pic from hobbywave coz my box is way below my stock of MG boxes, so I was lazy to pull that off the stack and take pictures...


and here is some pics of the kit...


Read more >>

Sunday, December 27, 2009

AC " White Glint " WIP commission work


Hello guys...This will be my first INTERNATIONAL commision work, the client is from the US and I am happy today coz the client has sent his 50% downpayment through my PayPal account already, thus I will be working on this soon...I just have to transfer it to my local ( Philippines ) bank account tomorrow and wait 3-7 days ( I think ) and buy the kit locally ( that is if it's available ).

The client commisioned me to do an Armored Core " White Glint "...I am free to do modifications on it and even alter it's color scheme ( I am thinking of a gray and white digital camo of some sort )...the great news is he likes it weathered and he likes my DOM and purple IJ ( which are over-detailed for some ), which I think I am most comfortable of, so I'll be working within my style.

The client's requirements is to make it sturdy ( no loose parts ), have full articulation, and paint job nice and weathered. So again, I am free to do mods with this kit and I am planning to create a simple small base for it ( coz I love doing bases ). I will have to study the design of the kit, to see what mods would look best with it.

The client gave me a link at PLAMO as reference as to how weathered he likes his kit to end up...HERE is the link:


The modeler is Oishi, I can't see infos in his PLAMO account, thus I cannot link it to his website ( if he has one ) but here are a few pictures of his great work I took from the PLAMO link...

Read more >>

Monday, November 16, 2009

Mazinger Z

Hello guys, I finished this build last July 6, 2009...I did it alongside my SD Destiny for three days. It is just and OOTB build for my boss, I rescribed the panel lines and did not paint the black parts, hands and sole of the feet ( coz they are made of rubber )...but gave it tons of clear gloss coat. I think I did a decent job and made a cheap crappy looking kit look like a cheap die cast toy.hehehe


Read more >>

Featured Post

Vallejo Mecha Color EXPLAINED

As usual, pardon for the selfies as I desperately try to get comfortable in front of the camera, for my new YouTube channel .  Le...

TOP POSTS