My apologies as I do not have many photos of this review, as I was focused on recording the video for my new Youtube channel.
I love the design of this kit. Even the old 1/100 HG is beautiful. But this one is an awesome MG. I love the overall look and design of this Zaku. Tall and not as bulky as usual. L
Let's do this in bullets!
PROS
The joints are great! Specially the joints or arms that hold the big gun to the backpack. The joints that hold the shield are also very nice and solid! Sturdy design! Gone are the flimsy designs of the older MGs ( at least for this kit.
Color separation of the parts are perfect ( as expected from a MG ). The construction of each part were not complicated and are all very straight forward.
The articulation is one of the best ( specially for a Zaku ). The arms and legs fold all the way. The hand wrist joints are very good also. Waist could be more flexible, but it is sturdy enough to hold the huge backpack and gun.
Most parts can be easily disassembled for painting after snap fit ( just cut the male pegs ).
A beautiful kit, best displayed in flight ( due to the big gun ).
The typical Zaku cabling is easier to clean as it did not came in separate pipes.
Armor details are good. But there is so much room for more.
CONS
Nubs are located along the bevels of the pieces ( armor parts ). Tricky to sand for beginners.
Seam lines along the guns and backpack ( expected ).
Seam lines along the upper arm, upper legs and lower leg parts.
There is a small red part ( I missed mentioning this on my video ) in the big gun that cannot be removed again ( after seam line removal ). Masking or hand painting will be required.
CONCLUSION
I love the kit so much. There is a sudden pang of sadness while looking at the kit, as this is not mine. This is a commissioned work. So will be giving to the client once finish.
Anyways, that's it!
Do check out the 12 minute video review at Youtube. As I've said there, I am not sure if I could do these kinds of videos, as I am really focused on painting, mods and dios.
Thanks as always for dropping by! Until next update guys!
Your hand painting with Vallejo Mecha Colors will be better if you use my custom MUG. lol, just kidding.
Other than wanting an excuse to take photos of my mug, and waking up early as I am an old man...
Let's talk shop!
Let's talk WHY Dilute Vallejo Mecha Colors with Distilled Water?
VALLEJO PAINTS
Vallejo paints ( from Model Color, Game Color to Mecha Colors ) vary in consistency. this is normal for acrylics. Vallejo is a high pigment count acrylic with the finest pigments in the market ( I do not have a microscope to test this tho ).
But as a painter ( once in a while ), painting ( on canvas ) with any PRO grade acrylics ( hobby grade or studio grade ) have varying degrees of consistency. The Reds and Yellows are thinner than the very creamy Browns and Greys. The Cream colors ( even in the airbrush paint ranges ) are super creamy.
In time you will learn how to thin acrylics ( in general ) to get master class or descent ( at least ) work.
DISTILLED WATER
I use only distilled water. Vallejo claims that their fine hobby grade pigments ( not industrial grade like cheaper brands ) can be stained by minerals from tap water. Tap water will pollute the paints. So I use only the purest form of water... distilled water.
Other high quality established acrylic paint brands ( I won't name them ) also advises thinning with distilled water.
IMHO, I do not see the difference of thinning with distilled water. Perhaps ( most likely ) my painting is not good enough to see the difference.
However, there is no harm in following Vallejo's instructions in using distilled water exclusively in rinsing and keeping your paint brushes wet. I keep small bottles of distilled water under my bench all the time. Distilled water are so cheap anyways.
DO NOT FOLLOW ( rebel me ) Vallejo's instructions of hand painting, much more airbrushing certain ( all ) Vallejo paints straight from the dropper bottle.
DO NOT FOLLOW ( I am so rebellious... I know ) thinning with distilled water as mediums and Vallejo Airbrush Thinners ( and Flow Improver ) are better, as they won't weaken the adherence and finish of the paints.
Note: I will always say this. Proper thinning for hand painting and airbrushing Vallejo Mecha Colors is key for a strong finish. Vallejo Mecha Colors were formulated to be extra strong and scratch resistant but know how to properly use them to get excellent results.
THINNING VALLEJO MECHA COLOR FOR HAND PAINTING
I thin my Mecha Color for hand painting with Vallejo Airbrush Thinner and Vallejo Mediums. At a rough ( this vary per color ) ratio of 4 parts paint, 2 parts Medium and 1 part Aibrush Thinner.
I keep my paint brush wet only with distilled water, and also only clean my paint brush with distilled water. I rarely use my wet palette and use a small plastic paint dish oftentimes. So I regularly wet my paint brush with distilled water during hand painting.
Also, I always rinse my paint brush while painting as these paints dry fast. ( I also use Retarder Mediums to slow down drying time during hand painting ).
I sometimes use my DIY open wet palette ( yes not closable ) when hand painting in thin amounts. This is filled only with distilled water up to the sponge level.
How I thin my Vallejo Mecha Color is better seen in my video below...
THINNING VALLEJO MECHA COLOR FOR AIRBRUSHING
I use Vallejo Mecha Thinner and Vallejo Airbrush Flow Improver in thinning my Vallejo Mecha Colors for Airbrush. Same as in hand painting, reds and yellow thin differently than the creamier greys and browns.
A rough ratio of 4 parts paint and 1 part thinner and 1 part flow improver for most paints.
I clean my airbrush ( like my paint brush ) regularly during painting.
I clean my airbrush with a diluted ( with tap water ) Vallejo Airbrush Thinner ( 50:50 )
How I thin my Vallejo Mecha Colors is better seen in these videos below...
CONCLUSION
I hope this early morning Vallejo Mecha Blog entry helps.
The real key to achieving great quality Vallejo Mecha Color finishes is by using my DC23 logo mug during painting. Hahaha.
Like I always say, invest in high quality tools and paints ( slowly ) as they are investments if you love the hobby ( and if you love your kits - ;b ).
Good paints and tools will last for years and will give you years of fun.
That's it. I hope you'll find this entry informative. Thanks as always for dropping by, until next update guys!
I've been using Vallejos ( mostly Vallejo Premium, Vallejo Game Colors and Vallejo Game Airs ) for years now. I started using them on my LOTR action figures ( Vallejo Model Color back in 2001 ). Frodo looks better dirty with washes and grime than the bare plastic after all.
I love Vallejos coz they are the best in hand painting. The paints adhere well to primed or varnished ( Vallejo varnish ) surfaces. And they self level. Vallejo Colors will never reactivate the previous layers ( like other paints do ), so building up of thin coats is super easy. Also the high pigment and finer ( microscopic ) pigments makes better coverage than others.
They are also great with airbrushing as they are non-toxic.
Also the paints are reasonably priced. The high pigment count and the shelf life ( I have Vallejos that are more than 10 years old ) makes the paints worth it! These paints ( like other well established paints ) are investments in themselves.
Lastly, Vallejos are now very accessible to everyone. you may now purchase Vallejo Model Color, Vallejo Model Air, Vallejo Game Color, Vallejo Game Air and Vallejo Mecha Colors ( The whole shebang ) at all Neutral Grounds everywhere!
I get my stock at Neutral Grounds Centris.
So happy that Neutral Grounds started importing these awesome paints!
Anyways, thanks as always for dropping by! Until next post guys! Just enjoy the hobby!
Just finished this quick weathering project. This project was basically a test, a sort of experiment that you can paint the Vallejo Mecha Colors on kits and figures ( any model surface ), even without priming. And that the paints when dry, will even look like the material of the kit / figure.
Vallejo also claims that the Mecha Color range were formulated to withstand regular handling and wear and tear of articulated kits like Kotobukiya, Gunpla, StarWars, Transformers and the like.
So I tested the paints!
I weathered this rubber ( rubber plastic of some sort ) Zaku figure without priming and painting the base colors. I used a ton of Vallejo Mecha Color Paints, but you could reduce the painting to around 8 to 10 colors. I really have to practice painting with sets of 6 to 8 colors ( limited palette ), so that I could share it with other modelers easier.
MECHA COLORS
Mecha Color Light Green
Mecha Color Green
Mecha Color Dark Green
Mecha Color Pure Black
Mecha Color Grey Sand
Mecha Color Chipping Brown
WEATHERING WASHES & INKS
Mecha Weathering Black Wash
Mecha Weathering Eng Soot Wash
Mecha Weathering Dark Rust Wash
Mecha Weathering Light Rust Wash
Mecha Weathering Oil Earth Wash
Game Ink Yellow
Game Ink Green
MECHA COLOR METALLICS
Mecha Color Light Steel
Mecha Color Dark Steel
Mecha Color Copper
MECHA FLOURESCENT
Magenta Flourescent
AUXILLIARY
Mecha Color Gloss Varnish
Mecha Color Matt Varnish
Retarder Medium
Airbrush Thinner
Flow Improver
Distilled Water
MY VALLEJO COLORS WEATHERING PROCESS ( in summary )
Hand paint Matt Varnish ( 3 thin coats )
Paint lighter colors with Mecha Color Light Green and Green
Dry brush Light Green
Paint shadows with Dark Green
Paint the chipping with Mecha Color Chipping Brown
Hand paint Gloss Varnish ( 3 thin coats )
Apply Mecha Weathering Washes in varying ratios
Filtering with Game Ink Yellow & Green
Hand paint Matt Varnish ( 3 thin coats )
Paint Pure Black on details, then Metallics
Paint Flo color ( mono eye )
Paint rain streaks and armor stains with washes
Asmuch as I want to talk you through in detail. I think it is easier to just watch my Youtube video below. Saludos!
Back in 2010, when the local organizer ( with the permission of Bandai ) created the Expert Category ( which I won ) making me and ( a couple more modelers ) no longer eligible for the Open Category at that time and a couple of years to follow.
This frustrated me, as I lost the drive to modify kits like crazy. Snap fitting and painting are fun and less work after all.
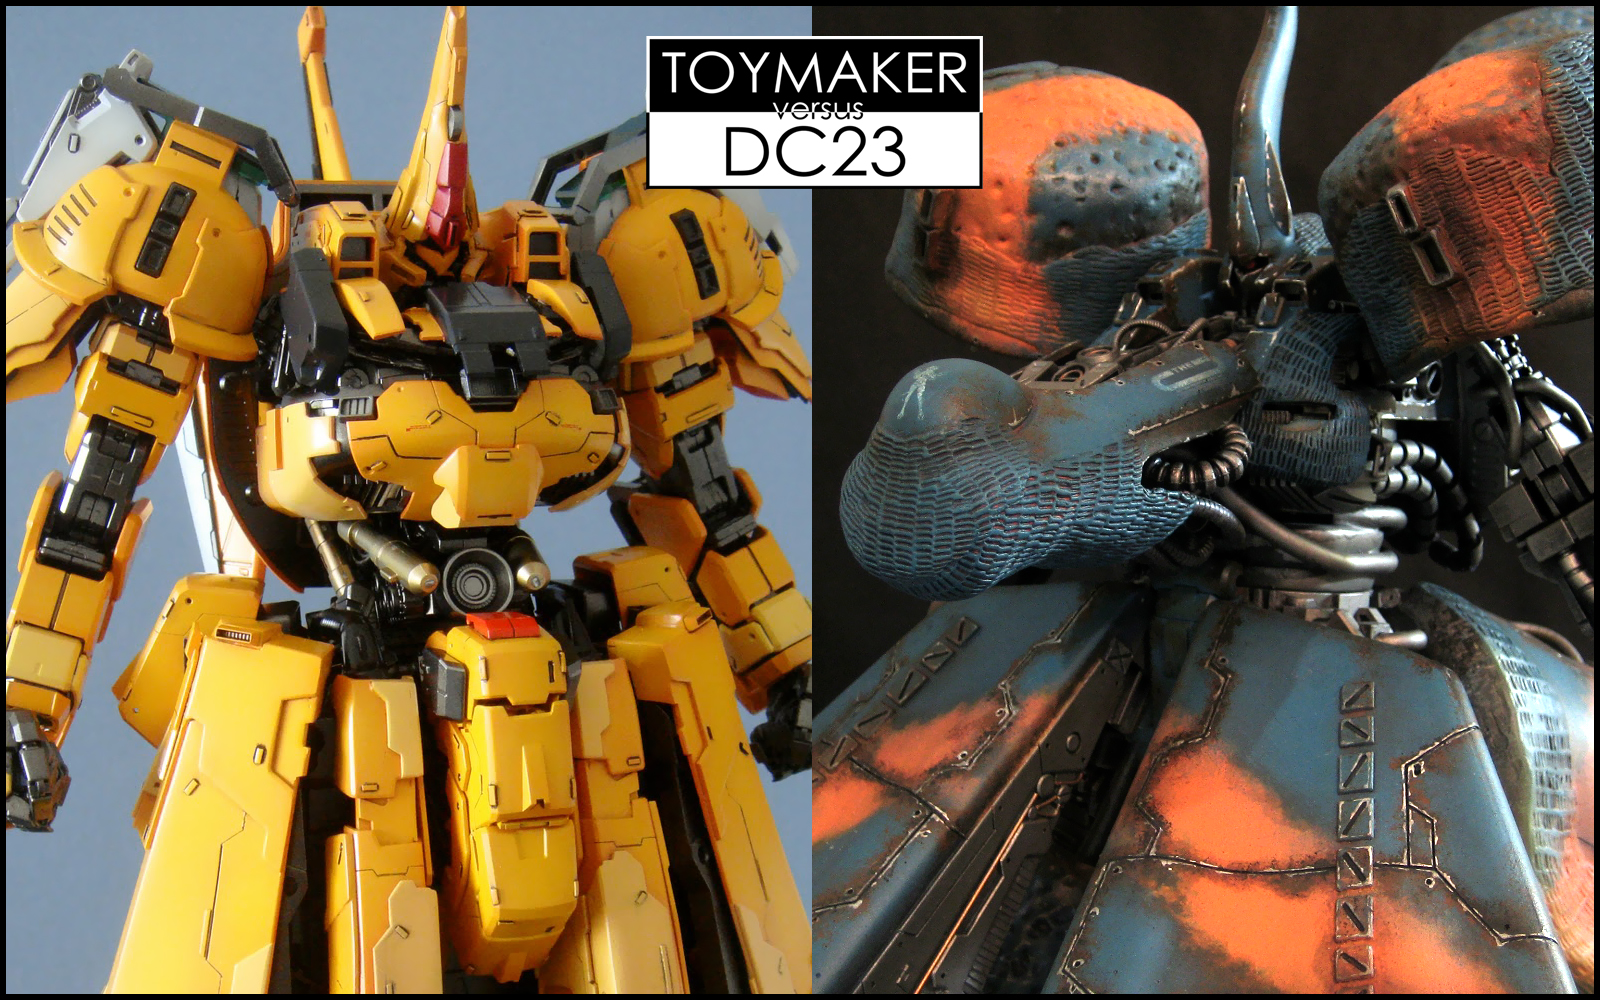
I then thought of asking Kenny Lim aka Toymaker to a Face / Build Off, to give me the drive to modify a huge kit. To my surprise, Kenny agreed! Kenny is like a mentor to me. I learned everything about Gunpla from blogs, websites and forums abroad. And Kenny's old blog was such an inspiration.
The build off back in 2010 was a MG The O kit. The Build off photos ( also posted here ) is the last gallery under my "Contest Gallery Page".
Fast forward to today, as I've said in this blog entry, I will be painting Mecha kits and drawing them as well, full time. I will also be designing more Mecha Designs for our DC23 clothing.
I will be painting ( modifying a bit ) commissioned Mecha works at least one kit ( or two ) per month. In fact I just started one ( MG Gunner Zaku Warrior) the other day. However, I wanted a side project, that will push me to modify a kit like a madman again.
Joining GBWC again is... errr... for my 16 year daughter. I have no plans of joining as of this writing. So I thought of Kenny again!
I feel a challenge from one of the best modelers of the world in Kenny ( Toymaker ) could push me to modify a kit like it's for a competition again. I also think that in order to push yourself to get better, you have to challenge the people that are better than you. People who are best in the world.
I am happy... as yet again... Kenny accepted my offer to another build off after 9 ( 10 years next year )! Woot woot! This will be more fun than 10 years ago!
Me and Kenny chose the MG Deep Striker as our Mecha Design canvas.
This is going to be so much fun!
As always, thanks a ton for dropping by! Until next update guys!
I had a handful of inquiries the past week regarding paints, what I use, airbrush set up and where I get my tools and supplies. I am always happy to answer them.
I had a very brief time of painting with some Japanese brand paints ( I like branded paints as I like using only quality paints and tools ). I also have a few other Japanese and USA airbrushes way back ( again, I like quality tools only ) and a precious ( gift ) generic airbrush from my dear friend Kriz.
But I am now exclusively using Vallejos, Harder&Steenbeck and certain tools moving forward.
I am only painting with Vallejo Colors ( Spain ) and airbrushing with Harder&Steenbeck airbrushes from Germany ( once again, I only like quality paints and tools ).
I also get my paints locally ( and a few tools and supplies ) from Neutral Grounds. I also get my tools and supplies from HobbyMate Singapore ( the best hobby shop at Sing ).
Just wanted to make this clear.
Cheers!
DAILY BLOG POST
I am also thinking of posting "daily" blog posts like this, as I am a full time Professional Illustrator and Professional Sci Fi Modeler ( moving forward ). Most artists ( at least here in the Philippines ) are employees. Scale modeling, much more Gunpla ( Mecha / Sci Fi ) modeling is just a weekend hobby for the majority.
Daily posts that I won't really share in other facebook groups or anything. Just some daily logs, a sort of a diary of a full time professional artist working at his home studio. How I start my day or something. I like blogging when I am about to sleep anyways.
Also, these kinds of posts could be inspiring for aspiring or even frustrated artists.
So let's talk shop!
WORK
Woke up, ate breakfast and drank coffee.
Drove my kids to school...went home and then I started work.
I did a bit of snap fitting of my commissioned MG Gunner Zaku Warrior.
Had an email meeting with one of my Gunpla partners for a few minutes, then...
I thought of suddenly recording a quick Vallejo Mecha Color weathering tutorial for my Youtube channel during the middle of my snap fitting. So I pulled out a figure to paint and started painting, errr... started weathering.
END OF WORK
I got hungry during the middle of weathering the figure. Thought of fetching the kids and get some groceries. Fetched the kids, went to the grocery and stayed there for a couple of hours. Drove back home and ... Voila!
The traffic here in the Philippines is one of the worst in the world. Specially during the Christmas season. Got home in time for dinner, ate dinner, then took a quick nap after dinner.
DC23 CLOTHING
Our DC23 clothing will be merging ( sort of ) with another clothing brand next year. Our partners came late night and we had a nice meeting here at our Home Studio. We are excited to launch a handful of new Mecha Designs with the new collaboration.
We needed a partner that could help us deliver the demand of our clients from as simple as shirt sizes, shirt color, material and the request of potential resellers abroad.
2020 will be bigger, better and more fun!
SUPER LATE NIGHT
After the meeting, I thought of resuming my weathering session. Will reveal this quick weathering project tomorrow.
That's it! That's my day. Not too productive today as a huge chunk of my day was spent on groceries with the kids and the traffic. This was still a productive day tho.
Anyways, thanks a ton for dropping by! Until next post guys! Just enjoy the hobby!
This is one of the reasons why I love Vallejos so much. They formulate and design paints depending on use. They also design auxiliary paints ( varnishes, thinners, binders and mediums ) to achieve optimal results. Acrylicos Vallejo has a super wide range of paints from Fine Art and crafts to hobby paints. It almost feel like toy collecting. lol
I saw that Angel Giraldez ( the awesome miniature painter ) uses mediums to thin paints for airbrushing ( in addition to using Vallejo thinner ). But I personally just use mediums for hand painting. To each his own I guess. lol
THE TRIFECTA
The Gloss Medium, Matt Medium and Satin Medium.
The Gloss Medium I mix with Black paints to hand paint undercoating for Vallejo Metallic paints. It is always best to paint metallics over a nice gloss black finish. I hand paint small pieces ( even bigger pieces like hands ) instead of masking them and airbrushing.
The Satin Medium is perfect for adding to paints when your painting leather and skin. They will give any Vallejo paint a nice sheen without looking wet and extremely shiny ( like the gloss medium ).
The Matt Medium is perfect for everything else. Note that the Matt Medium is not strong in comparison to the gloss and satin mediums. IMHO, The Matt Medium ( same with the Matt Varnish ) are the best ready mixed Matt auxiliary paints in the market.
THE CHIPPING MEDIUM
I have a ton of chipping mediums as I have a lot of Vallejo Rust and Weathering Paint Sets ( Paints that came in 6 or 8 paints per box ). Chema Cabrero, Tony Buendia and similar master scale modelers, use this medium a lot.
If you are into weathering and paint chipping effects, this is the only choice. Much like any of the Vallejo Paints, this medium is easy to hand paint. No need to put out your airbrush while hand painting weathering and chipping effects.
THE RETARDER MEDIUM
You can use this if you do not use wet palettes during hand painting. Wet palettes will keep your...errr... paint wet while painting, thus you can blend and mix paints together easily. However, I advice using this Retarder Medium if you like blending and mixing and keeping your paints wet a bit longer, both on a wet palette and on a mixing dish. Just use super small amounts of this. You do not want your paint to dry in a year or two ( just kidding ).
THE CRACKLE MEDIUM
This medium is crazy good albeit tricky to control. It gives you a somewhat ... errr... ruined finish. It will give the paint on top some cracks! Literally... you'll produce cracking paints if you use this. you can airbrush or hand paint this, paint over it... then watch your paint CRACK as it dries and cures. The is crazy stuff.
THE PIGMENT BINDER
The Pigment Binder is not a medium, but acts like a medium. lol
Basically you use this mixed with pigments. I will have to produce a video and upload on my Youtube channel to show the effects and how to use this medium well. This is great stuff if use properly.
THE METAL MEDIUM
This is a beautiful medium. It is a gloss medium with shiny micro particles. Unlike using normal gloss medium, this metal medium actually enhances the sheen and shine of Vallejo metallics. This is awesome stuff! I highly recommend this for any Mecha / Gunpla modeler who hand paints metallics! And yes... Vallejo Metallics, much more the Vallejo Metal Color line have their own Varnish!
CONCLUSION
Serious modelers, and definitely professional modelers should get all of these. However, hobbyists and weekend modelers should be fine with just the TRIFECTA ( Gloss, Satin and Matt Mediums ).
Like I always say, paints ( and tools ) are investments. They are not cheap. Kits are NOT CHEAP too... So always use the best paints and tools for your hobby. You need not buy everything in one blow... slowly invest.
Anyways, thanks as always for dropping by! Until next update guys!
No guys, this is NOT a review or unboxing post. We have the great Dalong.net and some Hobby Shops and Snap fitters at Youtube, for that already.
I just got this delivered to my studio by my client. This is my first Gunpla commission back to Gunpla. I will do some minor modifications to this kit.
I will start snap fit tonight after fetching the kids from school.
I plan to add my usual holes to some corners of the armor parts, do my usual armor trimming, a few panel line work and some chisel work ( still waiting for my new chisels from HobbyMate ).
This build should be fun. I will produce Youtube videos for some of the work done to this kit ( including the painting with Vallejo Mecha Colors ).
Pardon as this post is not really a review or unboxing. But then again we have other people for that.
Excited to share to you this build both here at my old blog and at my new Youtube Channel!
Thanks as always for dropping by! Until next update guys! Just enjoy the hobby!
Cheers!
MY PARTNERS
I only paint my Gunpla, Miniatures and Action Figures with Vallejos - Acrylicos Vallejo
I just checked my really old TUTORIAL page. And I realized that Photobucket is asking me to pay to display my banners properly. According to Photobucket, this is due to the bandwidth thing ( blog traffic ) that the tutorial page is getting.
I am too busy, too broke and too lazy to fix the banners now, so I just thought of creating a new page!
My old tutorial page has been getting a fairly good amount of traffic ( visits ) even during my inactivity from 2015 to last month. I am really happy that those old WIPS have been visited by a handful and hopefully have been informative or inspiring to some.
I am always fueled by the inspiration that I get from others and inspiration that I could give to others as well. This is the very reason I share my work in progresses too much. I even share my supposedly secret competition projects wayback.
I cannot thank all the people enough, who continued to visit this old blog, even during my inactivity.
This blog is slowly getting the normal traffic it was getting before. I am very happy to know that people ( specially serious Gunpla modelers and painters ) still love to read blogs. Blogs are not totally dead after all. I am very happy to have decided to keep this old blog going again.
Anyways, I have embedded my first 3 video tutorials in this post. I promise to do another and better ( with more close ups ) Armor trimming tutorial very soon.
I should be filling this new video tutorial page faster than usual, as I work on my Gunpla and miniature projects. I will also create shorter video tutorials ( but are still informative ) soon.
Old Gunpla friends know how fast I curn up not so well done Gunpla. LOL... But still I finish kits like hotcakes. Hahaha
Okay... I talked too much again. I hope you'll find the new page useful.
Thanks as always for dropping by! Until next update guys! Cheers!
The first part ( zenithal priming ) of this blog article is HERE.
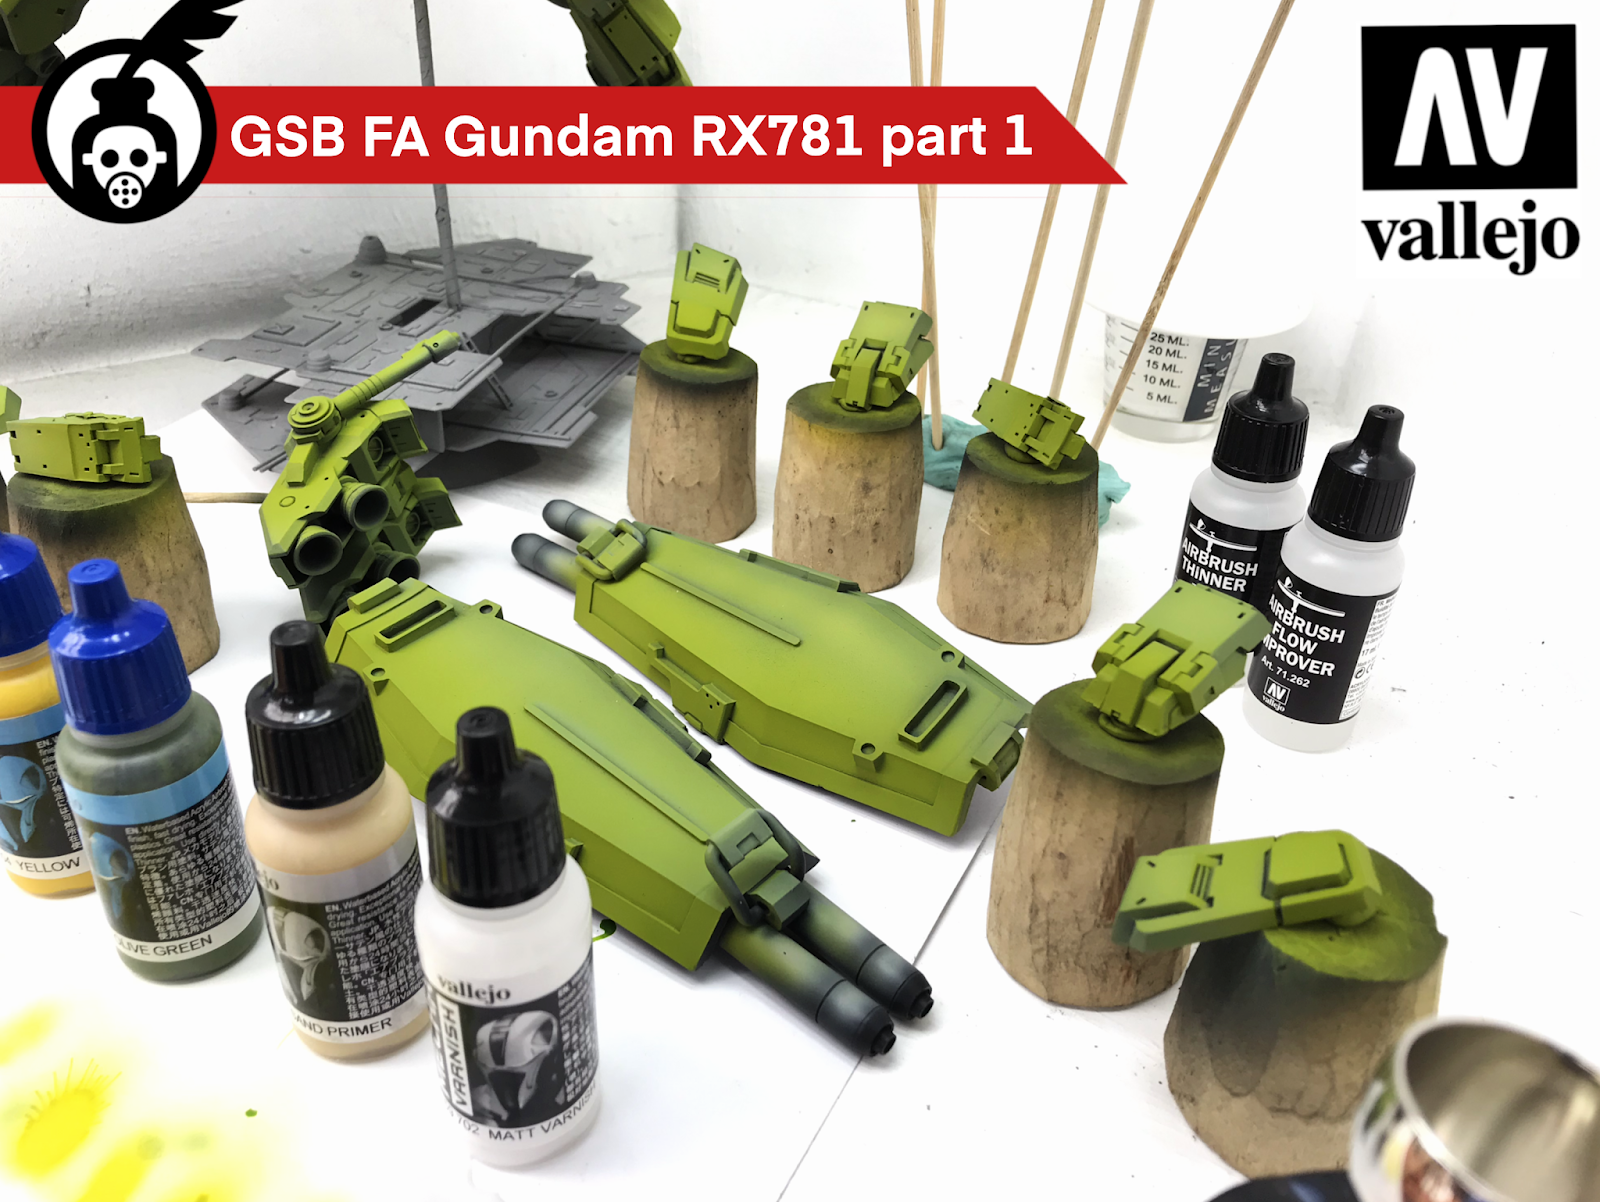
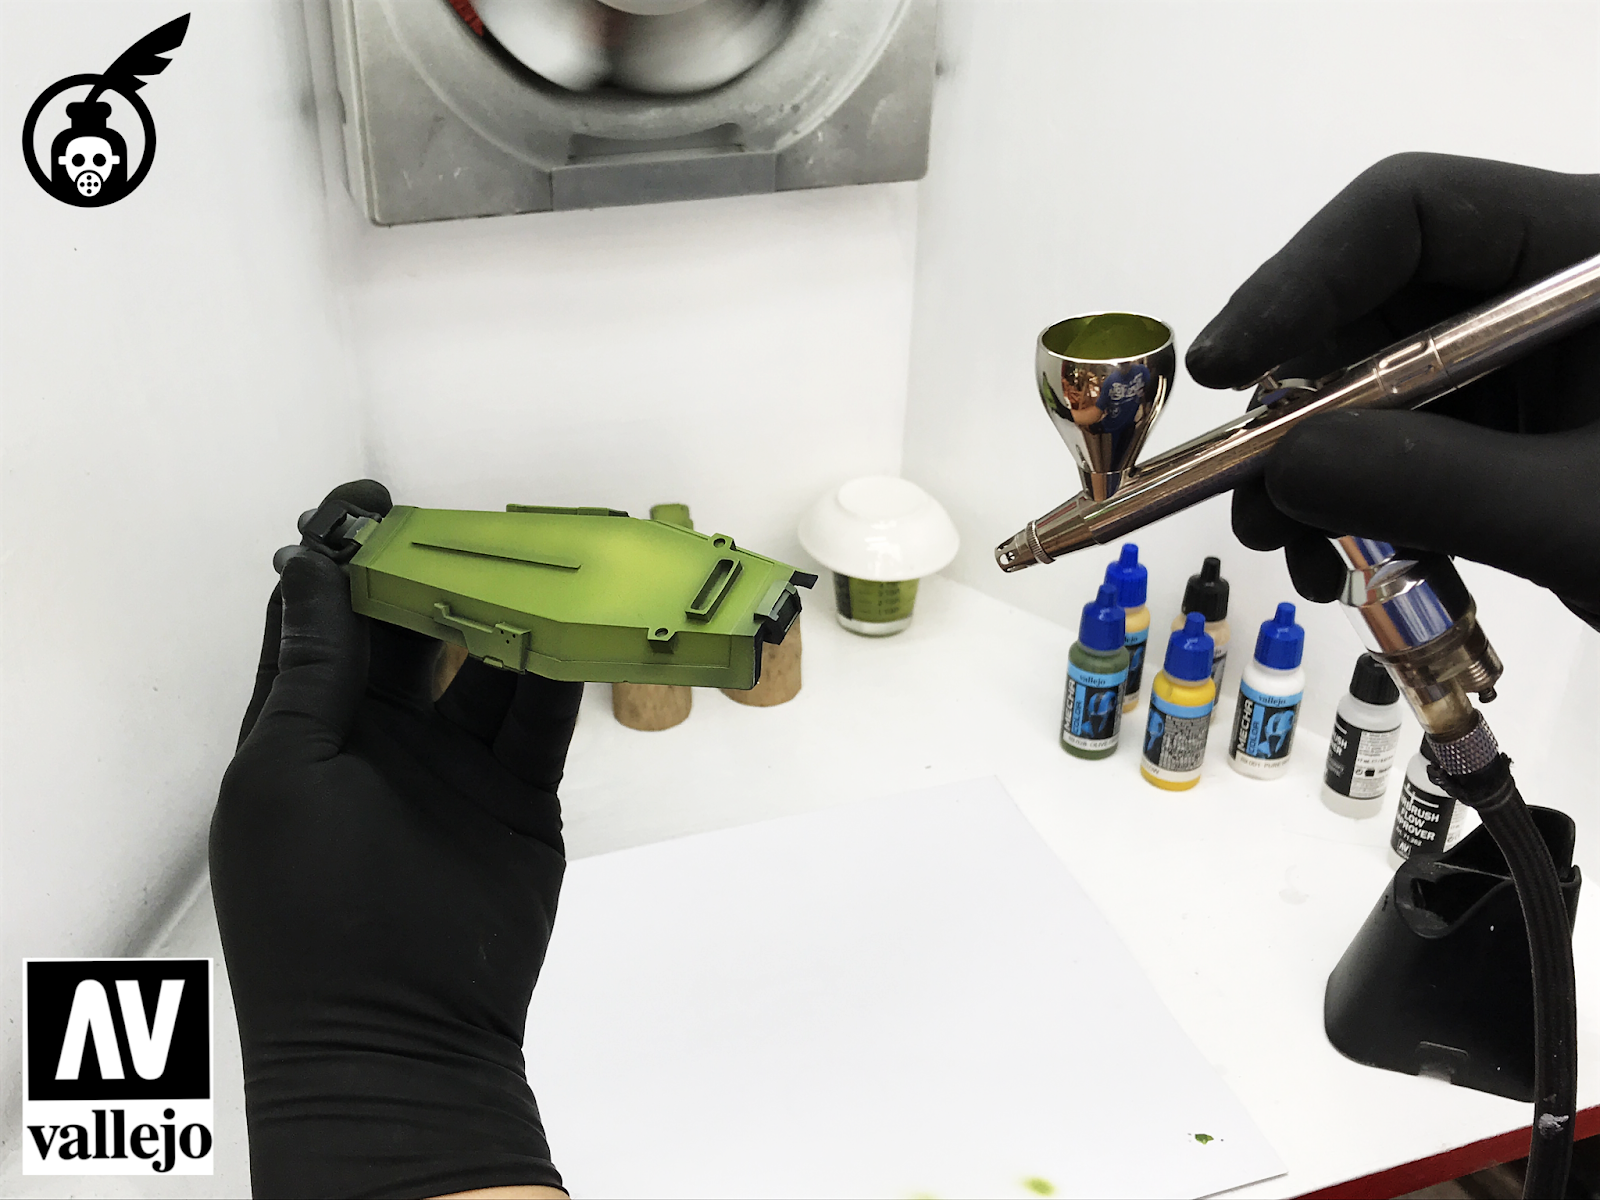
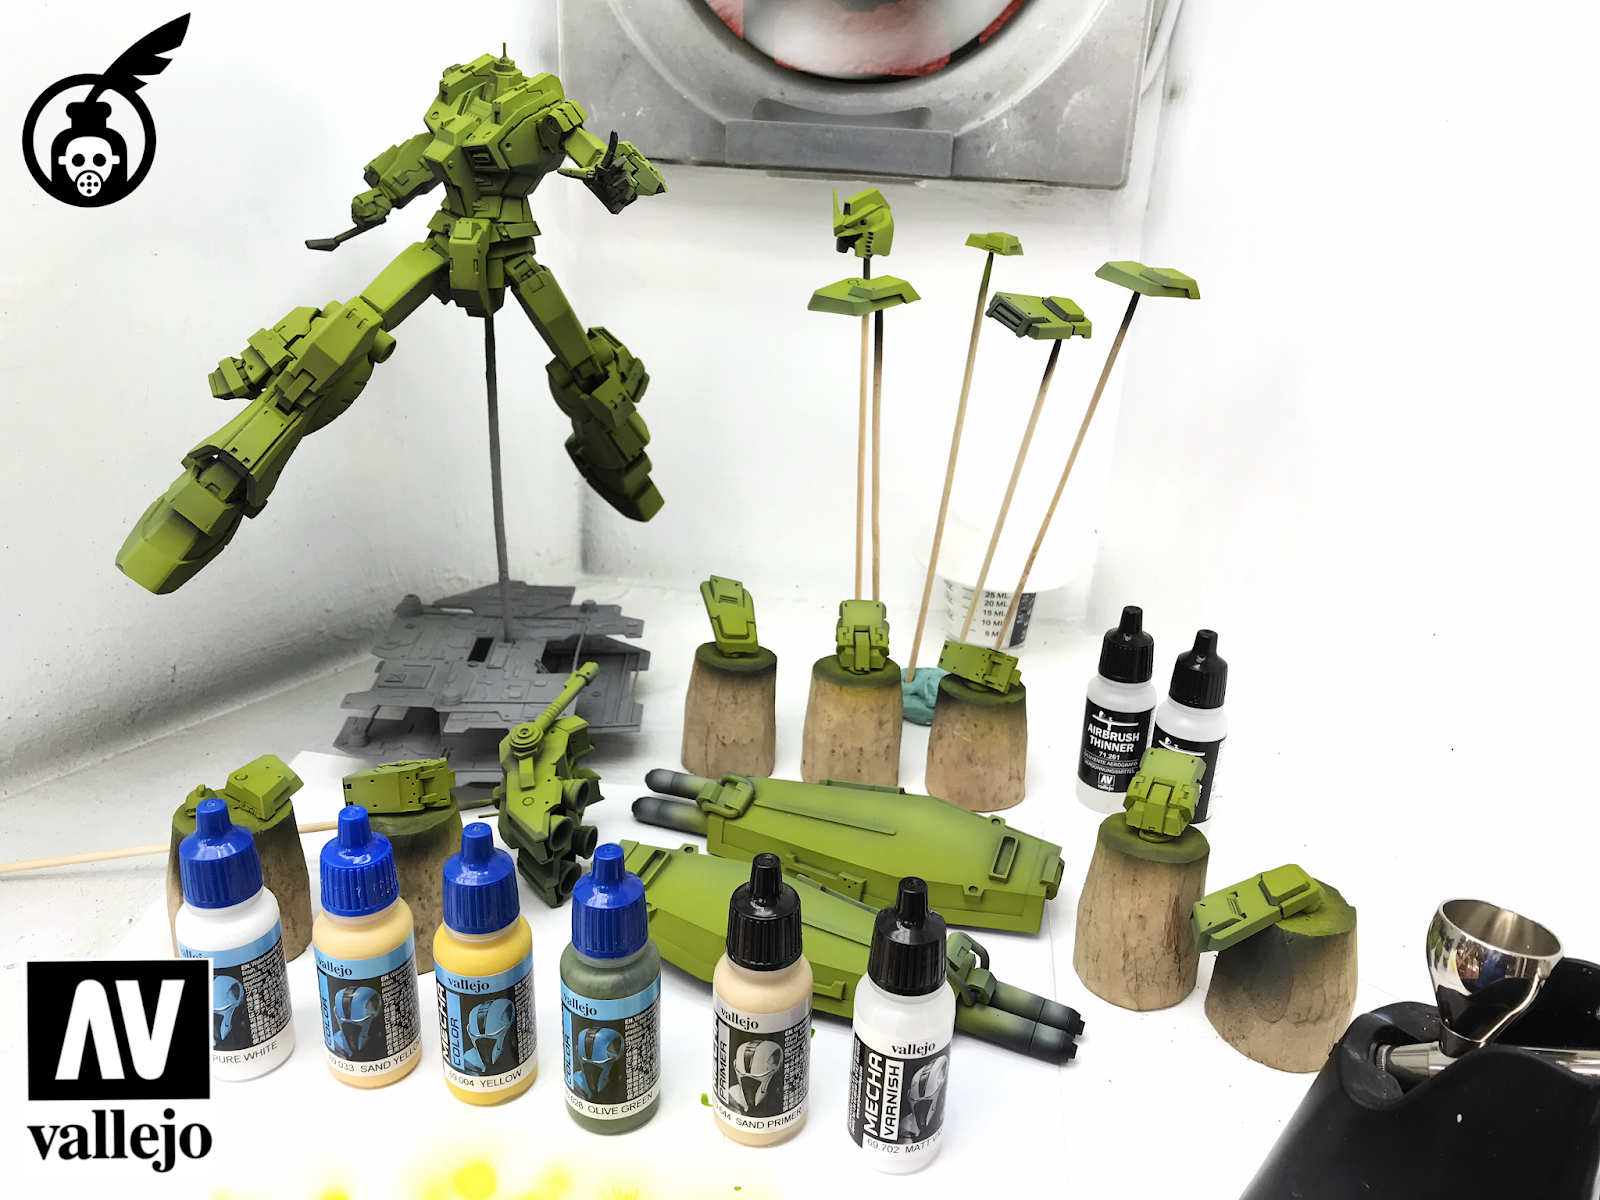
I painted the green base color by mixing Vallejo Mecha Color Olive Green and Mecha Color Yellow.
I wanted to make this base color really bright and vibrant. The Sand primer highlights in the previous post worked like a charm! I want a 200ml Mecha Sand Primer from now on.
I always thin my primer and paints with Vallejo ab thinner and flow improver. Ratios or how I miss them is better explained in my videos.
I also gave this base color some highlights of Olive Green mixed with Sand Primer. I added a couple of drops of Off White. I was not happy with the result. Thus I painted a thin coat of yellow to bring back the vibrance of the whole kit.
The highlighting is a simulation of having a light source at the upper right side of the kit. The underparts of the kit ( like the legs ) are actually still "blackish green". This lighting technique gives this fixed pose resin kit more depth and action.
Anyways, my apologies for not taking enough photos, as I was focused on the recording of the videos while painting.
Do check out my video of this painting at my Youtube channel for more info and tips.
Thanks as always for dropping by! Until next update guys! Just enjoy the hobby!