Search This Blog

DC23 Clothing

DC23 Clothing
Find Us At Facebook
Showing posts with label weathering with enamels. Show all posts

Wednesday, July 23, 2014

Weathered OR Clean for my PG SF???


PG RX 78-2 WIP modeling by MrGAVphoto

I am having second thoughts on the eventual finishing of my OLD Boys GB project if I will do a clean build or a weathered build due to Mr.Gav's WIP photos of his PG RX build.

Unlike Mr.Gav of Gavin Lee Manners, I very seldom do clean builds. I think I only have a couple of clean builds which are my MG Acguy and my commissioned work RG Aile Strike Gundam. I originally wanted to finish my PG SF clean... but as I've said Mr.Gav's work on his PG RX is poison!!! Great stuff as always and I am looking forward to the completed build!

I am as always leaning towards weathering my PG... I just think it will blend better on my diorama. I just can't make up my mind. Oh well... will see sooner than later. Will work on the diorama this weekend as I am itchy to weather and hand paint all of sudden.

Do check out Mr.Gav at his website at Gavin Lee Manners and also check his new account at Instagram...


PG RX 78-2 WIP modeling by MrGAVphoto

PG RX 78-2 WIP modeling by MrGAVphoto

PG RX 78-2 WIP modeling by MrGAVphoto

PG RX 78-2 WIP modeling by MrGAVphoto

Read more >>

Sunday, January 30, 2011

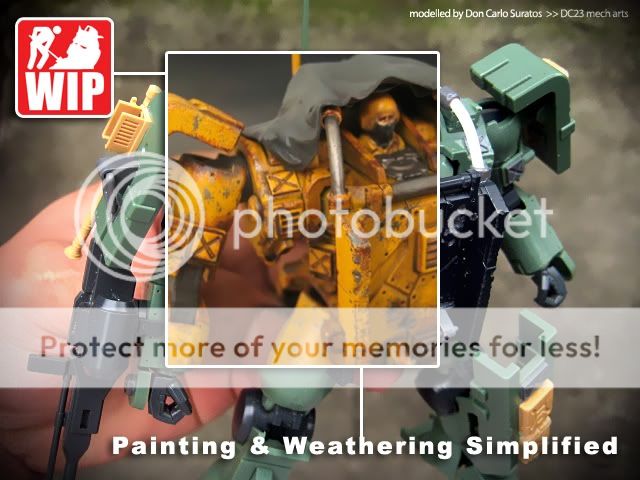
Painting and Weathering Simplified


Not a perfect build for a tutorial but I learned and experienced a few techniques during this build, thus I thought it could be a nice guide for people who are just starting into modeling or Gundam plastic modeling. All of the techniques like the weld effects, enamel washes and damaging have their own tutorial posts in my TUTORIAL page already. But a new entry on painting and weathering as a tutorial would not hurt I guess.

This also serves as my usual WIP summary every time I finish a build and I have too much multiple work in progress posts on this very simple and quick build, reconstructing all those posts into one is a bit more practical for readers to access. Now lets go through the build with some selected photos and some short capsules...

1. Pre - painting >>>
Remove seam lines, sand of nub marks, modify the kit to your liking or concept , and add some battle damage effects if you like.
Read more >>

Saturday, January 29, 2011

1/35 Tieren Ground Type WIP - enamel washes


I just finished doing some enamel washes. As expected it looks a ton better than after the paint chipping effects, the enamel washes effortlessly brought out the crevices and details of the kit and it also brought to life the weld effects I added to a few parts of the kit.

Notice that the finishing is still in gloss which is perfect for the washes. Just make sure not to erase or remove too much of the washes to retain the weathered look. Too much enamel clean up will result to an undesired clean look. I now have to seal this with future and apply a darker color wash for the small damages. I might also add a few more paint chip effects on a few areas.
Read more >>

Wednesday, December 16, 2009

weathering with enamels

Hello guys, here is a fast way to weather your kits and meet deadlines...there are a lot of ways to weather your kits, some do the hairspray+salt technique, some do drybrushing and a few with AB...I have not tried the hairspray technique yet, I do drybrushing sometimes and have weathered with my AB for dust and soot effects...but here I will show you the fastest I think, which is using Tamiya enamels and Tamiya weathering sets...
Here is a pic of a weathering master set...


FIRST, I did battle damage to the piece with my U-type hasegawa chisel...I think I overdid it though, coz I enjoyed using the chisel so much...Then paint the damages with gundam marker ( black )...I think brown is better or gray, but opted for black thinking that it would look older coz the concept is that the battle damage effects should look like 12 years old...

 SECOND, I gave it a nice enamel wash of Tamiya Khaki...

THIRD, another enamel wash of Tamiya flat brown...I dillute my enamels with ZIPPO lighter fluid in 30:70 ratio...30 % enamel paint of course and soon after a very dilluted ( 10:90 ) enamel wash of flat black...

Looks ok now, but I want to put some color to it, so I added a nice rust colored effect with my weathering master...just apply the weathering like pastels or make up...here is how it looks like now ( honestly I overdid it again )...


This is the shoulder of the MG Freedom in my " The Graveyard " diorama...here is how it looks right now...


HERE is the link of how it looks like before the being mounted to the " the graveyard " diorama:


Read more >>

Featured Post

Vallejo Mecha Color EXPLAINED

As usual, pardon for the selfies as I desperately try to get comfortable in front of the camera, for my new YouTube channel .  Le...

TOP POSTS