Search This Blog

DC23 Clothing

DC23 Clothing
Find Us At Facebook
Showing posts with label Khador. Show all posts

Wednesday, December 11, 2019

Khador Unit Kayazy Eliminators


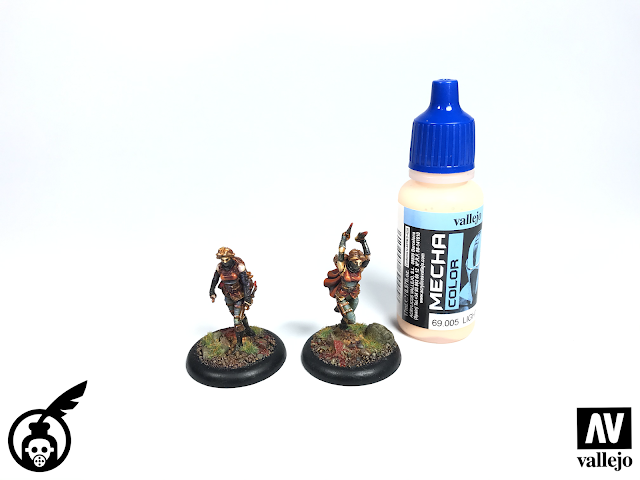
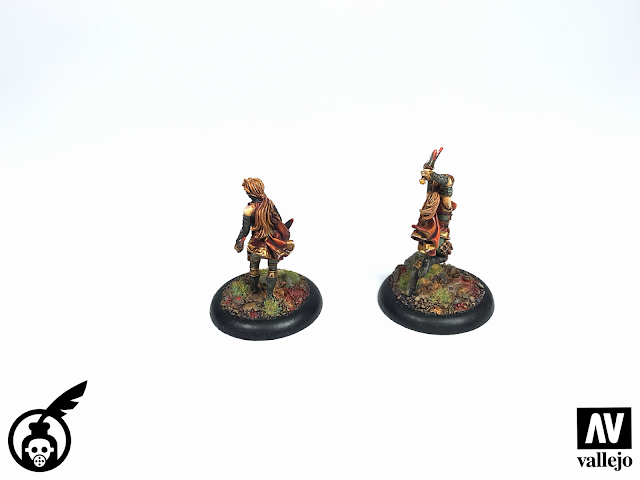
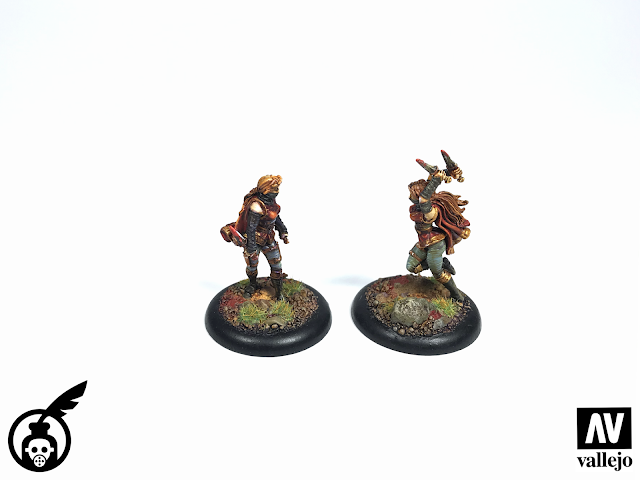
Khador Kayazy Eliminators Units Photo

I felt I needed to practice before I paint the Gunpla pilots in front of the camera for my new Youtube channel. So I decided to finish this unit of Khador Kayazy Eliminators. Nothing to write home about, just table top level painting for these two.

I had fun painting the... errr... torso.

Made sure the chest parts pop out well. I might have overdone it a bit, but I like how the upper torso looks on the table. I made the details pop out a bit more with Mecha Color Pure White, mixed with Game Air Bone White. The red parts I highlighted with Model Color Orange Rust and Mecha Color Yellow.

I definitely need better set of brushes. I only have a no.1 workable brush atm. A 00 or even a 000 sable brush would help me highlight the finer details like the hair next time. Decided this is done tho. Will try to do better with better brushes next time. Besides, it could be that I am rusty, as it has been a while since I painted minis.

Lastly, due to my experience in illustrations, I rarely use blacks or dark greys in shading shadows. I usually use purple inks ( specially on my trollbloods ). Purple shadows looks good imho, even when a bit overdone. Much like in illustrations, deep purple shadows in model kits and minis, enhances the base color. Purple ( inks ) shadows even on the ground work looks better for me.

This was also a quick photography test. I need a third light source at the back. I thought 2 strong lights will do. Alas I need 3! Hee hee

Thats's it! I hope you like my tiny little Kayazy Eliminators.

Until next update guys! Just enjoy the hobby!

Cheers!

Khador Kayazy Eliminators Units Photo

Khador Kayazy Eliminators Units Photo

Khador Kayazy Eliminators Units Photo

Khador Kayazy Eliminators Units Photo

Khador Kayazy Eliminators Units Photo


Shout Outs

I only paint my Gunpla, Miniatures and Action Figures with Vallejo Colors 


I get my tools only from HobbyMate Singapore 

I get my Vallejos and Miniatures only at Neutral Grounds 

Thanks! 

Read more >>

Monday, April 6, 2015

Warmachine Hordes Weekend Photo Dump 040615


Warmachine Hordes Weekend Photo Dump 040615photo

We had a 3 day break including Saturday last week and thus I think I was able to be very productive. This is not my norm as I report to a day job work ( 9 to 12 hours ) a day during weekdays. I did enjoy working on these Privateer Press miniatures for 3 days straight with a couple of Warmachine / Hordes games in between painting sessions with my 8 year old son and my 9 year old daughter.

Playing with my son and daughter makes this hobby extra fulfilling as you not only get to paint great looking miniature sculpts, you also get to spend quality playtime with your kids.

The purple Cryx army is mine as it is a trade-in payment for the commissioned works you see in this post. The Gatorman Bokor ( and Shamblers ), Alexia and the Risen, Khador Outriders, Mercenary Steelheads, Trollkin Long Riders and the Trollkin Champions are all commissioned works from the same client.

I also managed to squeeze a bit of time in painting my Mammoth and fully assembling the arms for the first time. Learned a lot painting these lot last weekend and hope to continue to work on them this coming weekend. Super fun stuff!

Thanks as always for dropping by! Until next post guys! Just enjoy the hobby! :)

Warmachine Hordes Weekend Photo Dump 040615photo

Warmachine Hordes Weekend Photo Dump 040615photo

Warmachine Hordes Weekend Photo Dump 040615photo

Warmachine Hordes Weekend Photo Dump 040615photo

Warmachine Hordes Weekend Photo Dump 040615photo

Warmachine Hordes Weekend Photo Dump 040615photo

Warmachine Hordes Weekend Photo Dump 040615photo

Warmachine Hordes Weekend Photo Dump 040615photo

Warmachine Hordes Weekend Photo Dump 040615photo

Warmachine Hordes Weekend Photo Dump 040615photo

Warmachine Hordes Weekend Photo Dump 040615photo

Warmachine Hordes Weekend Photo Dump 040615photo

Warmachine Hordes Weekend Photo Dump 040615photo

Warmachine Hordes Weekend Photo Dump 040615photo

Warmachine Hordes Weekend Photo Dump 040615photo

Warmachine Hordes Weekend Photo Dump 040615photo

Warmachine Hordes Weekend Photo Dump 040615photo

Warmachine Hordes Weekend Photo Dump 040615photo

Warmachine Hordes Weekend Photo Dump 040615photo

Warmachine Hordes Weekend Photo Dump 040615photo

Warmachine Hordes Weekend Photo Dump 040615photo

Warmachine Hordes Weekend Photo Dump 040615photo

Warmachine Hordes Weekend Photo Dump 040615photo

Warmachine Hordes Weekend Photo Dump 040615photo

Warmachine Hordes Weekend Photo Dump 040615photo

Warmachine Hordes Weekend Photo Dump 040615photo

Warmachine Hordes Weekend Photo Dump 040615photo

Warmachine Hordes Weekend Photo Dump 040615photo

Warmachine Hordes Weekend Photo Dump 040615photo

Warmachine Hordes Weekend Photo Dump 040615photo
Read more >>

Monday, February 23, 2015

How To Make Terrain For Your Miniatures tutorial

How To Make Terrain For Your Miniatures tutorialphoto

As always I want to share this quick tutorial on how to make nice terrain for your miniatures. The terrain ( hills ) I did here was designed and painted to look and match the Warmahordes aesthetics. The Hills was not designed to look realistic and the colors are brighter than usual.

The finished pieces are posted HERE.

You will need corkboard ( optional ), styropor, wood glue or white glue, texture paint or glue and sand, and paints ( use acrylic paints as toxic lacquer paints will melt away styropor ).

The outline photos below will guide you on how to make a quick terrain piece for your minis.

1. I used a 1/4 inch thick cork board as my main material on top as it is more durable than the usual styropor. You could use the packaging type styropor but I have a hard time cutting it to have a really flat top surface. I cut the cork board and the 1/2 thick styropor to my desired shape and glued them together.

How To Make Terrain For Your Miniatures tutorialphoto

How To Make Terrain For Your Miniatures tutorialphoto

2. Notice the light colored dots on the cork board? I inserted some satay sticks to keep them in place while the wood glue was curing. I then applied texture paint all over the piece to hide the actual texture of the styropor. You could apply the texture paints around the styropor only and retain the nice consistent texture of the cork board ( I know I will next time ). I also glued some aquarium pebbles all over to give it an additional texture.

How To Make Terrain For Your Miniatures tutorialphoto

The photo below shows the cured texture paint ( overnight curing ). Vallejo texture paints usually cure to a hard rubbery to rocky finish. Great stuff to produce those irregular textures on the sides of this hill. Now your hills is ready for painting!

How To Make Terrain For Your Miniatures tutorialphoto

3. Zenithal Priming as usual! I primed the whole piece with Russian Green primer ( preferably black ) and shot Vallejo White Surface Primer directly 90 degrees on top. Now I have a nice base coat that will affect the transparent paints on top later.

How To Make Terrain For Your Miniatures tutorialphoto

4. Base Coat - I sprayed some nice loud colors before the washes. Washes will always darken your work. So painting lighter base colors than the actual colors is highly recommended. Unless you like really dark toned pieces.

How To Make Terrain For Your Miniatures tutorialphoto


5. Dry brushed the main colors of the aquarium pebbles and the highlights. The photo below shows the pieces with highlights. The pieces are now ready for the washes.

How To Make Terrain For Your Miniatures tutorialphoto

6. Last step was to do the washes and a Matt Varnish topcoat. I wanted to finish these pieces already, so I discovered something! Instead of doing washes, I loaded my Vallejo Inks into my airbrush and did some post shading! Damn it worked like the old Tamiya Smoke, only better!

Why better you ask? Better because I have so many Vallejo Inks and Washes in different colors! lol

How To Make Terrain For Your Miniatures tutorialphoto

I hope you find this post helpful. Thanks as always for dropping by! Until next post guys! Just enjoy the hobby! :)
Read more >>

Warmachine Terrain - Hills by DC23

Warmachine Terrain - Hills by DC23photo

Just want to share a quick terrain I did for my Warmachine and Hordes miniatures. A ton of thanks to Kim Navarro ( local vetaran Warmahordes player ) for answering all my queries on the nuisance of hills in actual game play and the standard tournament measurements as well.

The tutorial on how I made this is HERE.

I tried to compliment the design aesthetics of Warmachine and Hordes with these hills. The rock formations are more edgy and cartoony unlike usual dioramas. The painting is also high contrast and the colors are brighter than usual. I feel the finish and the design fits the look of my Warmahordes or Warmahordes in general.

I usually play a scaled down version ( no focus or fury points ) of the game with my 8 year old son during weekends. We agreed +2DEF to the RAT of characters on top of the hills. I had fun shooting out his Khador Infantry with my Khador Widowmaker Marksman. I ended up with a dead Sorscha anyways. No hill could help my Sorscha at the end of the game.

Hope you like my simple hill terrain... will do a few linear obstacles and a couple of forests soon! Thanks as always for dropping by! Until next post guys! Just enjoy the hobby! :)

Warmachine Terrain - Hills by DC23photo

Warmachine Terrain - Hills by DC23photo

Warmachine Terrain - Hills by DC23photo

Warmachine Terrain - Hills by DC23photo

Warmachine Terrain - Hills by DC23photo

Warmachine Terrain - Hills by DC23photo

Warmachine Terrain - Hills by DC23photo

Read more >>

Featured Post

Vallejo Mecha Color EXPLAINED

As usual, pardon for the selfies as I desperately try to get comfortable in front of the camera, for my new YouTube channel .  Le...

TOP POSTS