Search This Blog

DC23 Clothing

DC23 Clothing
Find Us At Facebook
Showing posts with label Warmachine Project. Show all posts

Monday, May 28, 2012

WIP - Warmachine Terrain pieces reboot


WIP - Warmachine Terrain pieces reboot photo

Obviously I am very unhappy with how my ongoing commissioned Warmachine terrain pieces turned out after painting. My ground work looks toy like after painting and the 2 hills looks like giant cookies or hamburgers. So WHAT went wrong?

I thought my painting could save my lousy groundwork. Basically I had a hard time cutting the styropor blocks my client gave me. I had a hard time cutting the blocks to flat pieces with flat tops. I also thought that a thin paper mache around the edges of the OLD Terrain pieces ( see link or photo below ) will give them enough rock like texture ( I was obviously wrong ). The edges of the old terrain pieces looks so smooth and uninteresting. They look like giant cookies. The painting is also very thick softening the sand texture and making it look muddy than desert looking.

WIP - Warmachine Terrain pieces reboot photo
 
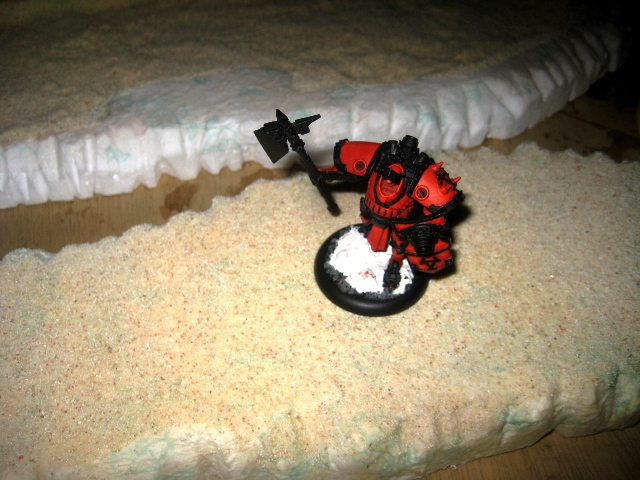
SO I bought some new materials for the Terrain pieces and thought I'll give it another try. This time I was very mindful that paper mache ( thin layers ) would not give the rock formations on the edges of the pieces, and so I carved the edges of the flat styropor to simulate a rocky edge / cliff.

After playing Warmachine with my brother and daughter for a few times, I think making the Terrain pieces bigger should be a bit more fun. I did a couple of bases as rivers, huge hill and a forest. I plan to use resin OR water effects paint for the river and should ( hopefully ) look great after painting.

Instead of applying more paper mache on the edges I think I have to buy a can of Dutchboy Versatex paint. The high profile kind according to a painter friend ( CJ SY ) told me that it is great for applying texture that hardens like rock ( Never a fan of plaster as it breaks easily ). Should grab a can soon and will create a simple tutorial about it.


 A few materials to buy ( resin, Vallejo water effects paint, Dutchboy Versatex paint ) and this terrain pieces should look better than the old one.

Now here are a few crappy photos of the pieces after a thin layer of mache and sand...
WIP - Warmachine Terrain pieces reboot photo

WIP - Warmachine Terrain pieces reboot photo

WIP - Warmachine Terrain pieces reboot photo

WIP - Warmachine Terrain pieces reboot photo

WIP - Warmachine Terrain pieces reboot photo
Read more >>

Friday, March 16, 2012

Warmachine MERCENARIES Warjacks photo list


Warmachine MERCENARIES Warjack photo

As I build up my Trollbloods army and if my budget permits get to slowly build up a Cygnar or Protectorate of Menoth army, I think there will be a time I would want to paint something " yellow ". I always liked painting and weathering yellow robots! The Caterpillar yellow color just looks so awesome on these mechanical beasts.

I would not want to paint my whole ( future ) Cygnar army yellow, much more paint a Protectorate of Menoth yellow! So I just saw the perfect candidates for custom color schemes, heavy weathering and absurd paint jobs... I introduce to you the Warjacks of the Mercenaries!

The Mercenaries as their names suggest are in fact your usual mercenaries. They are homeless and are just paid hunch men. Anyone who could afford these killer people could have them on their side. Ruthless things that only speaks the money language. So I personally think being " color " less or badge less or country less... makes them the perfect candidates for personal custom color schemes!
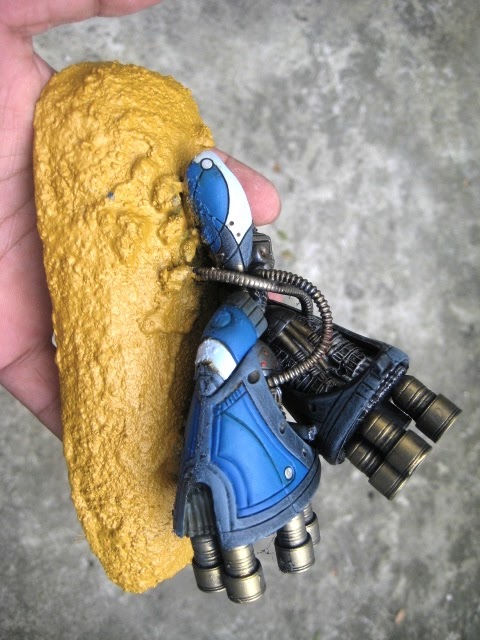
Painting these guys yellow or even in rainbow colors does not matter I think... so unlike starting an army of the other Warmachine factions, these Mercenaries Warjacks could be your usual random buy.


Warmachine MERCENARIES Warjack photo


Warmachine MERCENARIES Warjack photo


Warmachine MERCENARIES Warjack photo


Warmachine MERCENARIES Warjack photo


Warmachine MERCENARIES Warjack photo


Warmachine MERCENARIES Warjack photo


Warmachine MERCENARIES Warjack photo


Warmachine MERCENARIES Warjack photo


Warmachine MERCENARIES Warjack photo


Warmachine MERCENARIES Warjack photo


Warmachine MERCENARIES Warjack photo


Warmachine MERCENARIES Warjack photo


Warmachine MERCENARIES Warjack photo


Warmachine MERCENARIES Warjack photo


Warmachine MERCENARIES Warjack photo


Warmachine MERCENARIES Warjack photo


Warmachine MERCENARIES Warjack photo

Read more >>

Sunday, February 19, 2012

mini WAR GAMING table WIP - painting


mini WAR GAMING table WIP photo

I managed to squeeze in a few hours this weekend and I finished painting a few pieces for my mini War Gaming table modular pieces ( commission work ).

I have yet to dry brush the terrain and have yet to weather the " ruin " pieces. As always I ran out of a few supplies again and could not finish the pieces you see in the photos. The two " watch towers " are almost done and should have been done if only I have super glue and black spray paint. The other pieces was painted with Vallejo paints as usual and will be sealed with future later.

I will then weather the pieces with enamel washes and some Vallejo paints tomorrow ( once the future has cured ) and seal them in flat coat to finish it up. For the meantime here are a few photos for my client to see...

mini WAR GAMING table WIP photo

mini WAR GAMING table WIP photo

mini WAR GAMING table WIP photo

mini WAR GAMING table WIP photo

mini WAR GAMING table WIP photo

mini WAR GAMING table WIP photo

mini WAR GAMING table WIP photo

mini WAR GAMING table WIP photo

mini WAR GAMING table WIP photo

 mini WAR GAMING table WIP photo

mini WAR GAMING table WIP photo

mini WAR GAMING table WIP photo

mini WAR GAMING table WIP photo

mini WAR GAMING table WIP photo

mini WAR GAMING table WIP photo
Read more >>

Monday, January 30, 2012

mini WAR GAMING table WIP - desert base color


mini WAR GAMING table WIP - desert base color photo

Just bought a few supplies this past weekend thus I was able to work on my WarMachine Gaming table commission. I bought some epoxy putty, some gel type super glues and some acrylic paints.

Pardon the inactivity here in my website though. My modeling mojo is not down at all, I am just focusing on my real work these days as I am aiming for something I want. Maybe once I get what I want at work, will have the peace of mind to do more Gunpla on weekends at the very least. Wish me luck guys!

Anyways, my objective for these modular pieces is to make them as playable, durable and eye catching as possible. So unlike super realistic groundwork ( real sand glued over the base which easily flakes off ), I made sure that the sand is well mixed with the glue and not sprinkled. The technique gives it a hard sand coating but is not as realistic looking. However this technique gives you a nice texture that does not flake off during game play. The painting of the pieces will also be more high contrasting and with bolder colors. Less realistic looking but will be more eye catching.

I used the Epoxy Putty to create the rock pavement across the two " HILL " pieces. I created a pattern out of scrap pla plates and pressed them over the wet putty. Looks okay after the base painting but I hope they look better after I add pigments and a few acrylic washes.

I also bought my biggest Acrylic paint ever! It's a ONE liter Chromacryl by Chroma. It's a yellow oxide which is the base color of all the modular pieces. I regret not getting the Vallejo half liter counterpart though, as I needed 3 thick coatings to achieve a solid base color. Unlike the Vallejos which only needs a coat for creating solid colors. However Chromacryl is half the price of Vallejos! A liter of Chromacryl costs ( 700 Php ) the same as half ( 500 ml ) liter of Vallejo.


Chromacryl was great though as it is slightly better than the cheaper Reeves and Liquitex acrylics.

I also managed to start work on the two " WATCH TOWER " pieces. I used old satay sticks to reduce cost. Should look like quickly put up wooden watch towers with metal sheets at the bottom for protection. Looking forward to showing you more updates soon.

The pieces below are not yet finish. I have yet to add a few details, some dry brushing and more painting on all the pieces. Hope my client likes them so far...


mini WAR GAMING table WIP - desert base color photo


mini WAR GAMING table WIP - desert base color photo


mini WAR GAMING table WIP - desert base color photo


mini WAR GAMING table WIP - desert base color photo


mini WAR GAMING table WIP - desert base color photo


mini WAR GAMING table WIP - desert base color photo


mini WAR GAMING table WIP - desert base color photo


mini WAR GAMING table WIP - desert base color photo


mini WAR GAMING table WIP - desert base color photo


mini WAR GAMING table WIP - desert base color photo


mini WAR GAMING table WIP - desert base color photo


mini WAR GAMING table WIP - desert base color photo

mini WAR GAMING table WIP - desert base color photo


Read more >>

Featured Post

Vallejo Mecha Color EXPLAINED

As usual, pardon for the selfies as I desperately try to get comfortable in front of the camera, for my new YouTube channel .  Le...

TOP POSTS