UPDATE 04-06-10 : initial torso and shoulder mods...
Ello guys, this is just a quick update before going to work today... guess what? I remove another seam line today, this time the shoulder armor. I overlooked it before, coz the seam line at the top part is well placed and is very passable not to remove it, but then I realized that the bottom part has a nice long seam line running through out the whole part.
Basically, I glued the shoulder armor tight but of course retained the transformation gimmick...I also added some quick and usual koto option parts detailing and will add on my usual non sense, purely cosmetic pla plating all over the torso and shoulder parts later after office. I did all this in a couple of hours...so if I a lot at least a couple of hours everyday instead of just working on weekends, I think this will speed up my progress. Anyways here are some pics...
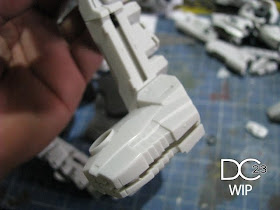
Here is the seam line running through out the bottom of the shoulder armor...
and some gaps that always loosens up whenever you transform it...

SO, basically I glued ( cemented ) all of the parts to make it solid...

but still retaining the transformation / folding gimmick...


The photo below shows all the seam lines I removed yesterday and have sanded them smooth oledi...now they are ready for some detailing...

I gave the torso area some quick koto detailing and will add small pla plates to compliment the pla plate patterns I did on the legs...


The photo below shows that I am still influenced by my Votoms build...I did some simple squarish ( 1mm ) pla plating on this part giving it a realistic and military feel. Ey, layers of thick pla plates as armor layering seems more realistic to me than exposed internals. ;)

BTW, I also plan to do this sort of square pla plating on the PG MKII but I plan to use thicker, maybe 1.6 mm pla plates.


Well, that is about it for today...this build is speeding up a bit coz I've done all the seam lines oledi...however I do need to rescribe all the existing panel lines soon and that is a bit boring in camparison to detailing. hihi. Thanks for viewing! til' next post. ;)

I fell in love, your work is f-wkin beauty, cant wait to see this in one piece^^
ReplyDeleteThanks bro...will try to finish this in a couple of weeks. ;)
ReplyDeletelook for
ReplyDeletehobby japan 2009 july
it have seam line guide to finish white glint
but seeing how far you progress, all i can say its too late
i wish i told you before... but o well :D
good luck!
about the transformation gimmick
ReplyDeletewhat will you do to not made it scratch each other?
@ hunter, thanks for the HJ tip bro...kinda late but thanks. Not sure what I'll do to prevent scratching...made sand it a bit to allow a bit more movement...but that might loosen the parts. SO, Maybe I'll just let it scratch...I mean I will prime it gray ( lacquer ) and paint it white ( acrylic ) later...so scratching will reveal " real " weathering effects. hehe ;)
ReplyDelete