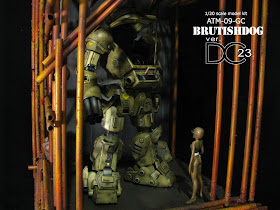
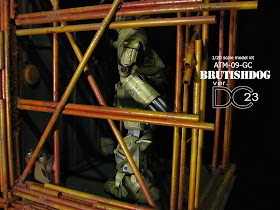
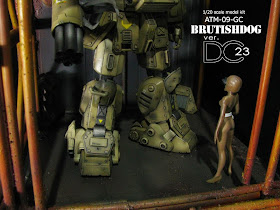
Ello guys, I finished this around 6 pm today and I have been taking photos and cleaning the photos in photoshop since then. The bad news is that while I was spraying the final flat coat on the Torso and waist area...the clip slipped and the parts fell roughly 3 feet above the ground. The left side skirt armor broke off from the waist and one of the antennae also broke. This made me skip detail painting the figure that is suppose to sit inside the cockpit ( though I painted it oledi ).
Anyways, I can't find the piece of plasttis that is holding the side skirt to the waist part...so I figured to just let it be... besides, this is a hangar diorama. I then decided to remove the backpack and place both the backpack and the side skirt at the background...making it look like that it is under repair of some sort.
Another thing is that I enjoyed the photography style that I did with the hguc Geara Zulu. The lighting set up for the Geara is a two lights set up only, giving the subject lots of contrast and lots of shadows on one side...But I eventually played with the lighting of this one even more. I figured that a stylized moody lighting would make this kit look more interesting than taking photos of it as I would my other Gundams ( well lit - outdoor shot style ). Anyways here are some pics with the same two lights set up as the hguc Geara Zulu...
Ok those were the photos shot with the same two lights set up as the Geara Zulu...you can see that it is still high contrast and the shadows exaggerated the depth of the parts of the kit...I like it very much. But, I thought it needed more punch...so I added a third light source on top making it look like a lamp or something. The third light source gave the kit more depth and it looks a bit more like it is in a real old hangar with it's pilot...now the next photos are more dramatic and realistic...
Obviously I enjoyed taking photos of the kit with the 3 lights set up...it looks a bit more realistic, has more depth and looks a ton more interesting than my usual photos of my kits which are taken outdoors under a shade. However, this mood lighting photos might not work with Gundams, simply coz a lot more people are interested in seeing the details of the Gundam builds, thus most might prefer the usual well lit photography for Gundams. I like this current set up very much though and it is perfect for this kit, coz not much people are interested in looking at the build in plain photos. BTW, the third light source is my Nokia cellphone. hihi
Thanks for viewing! til next post! ;)


This comment has been removed by the author.
ReplyDeleteGreat work man. On both the model and the photos. I really do like these realistic photo setups.
ReplyDeleteI like the normal style of Gunpla photos as well, because like you said, it really showcases the details of the model. But I also think that people should do more realism type shots, like they ones you did here. It makes the model look like something in a movie. Very cool indeed. I would really like to see you try something like this with a Gundam too. It could be like the Gundam movie we all want to see ;)
Thanks Mesmer! will do, I mean I will try to think of concepts for a Gundam photo shoot aside from the normal setup. But will definitely do this on non Gundams...my next finished project is the AC White Glint...will shoot that kit with a standard setup and a realistic photo setup. thanks bro for dropping by! ;)
ReplyDeleteawesome work! I love the lighting for this diorama, really gives it a lot of depth and realism.
ReplyDeleteThanks Mathai! I actually enjoyed the photo shoot on this one..I usually hate the photography part, maybe because I get bored with the standard way of shooting the kits. ;)
ReplyDeleteWhat can I say, one word - Beautiful !!! :)
ReplyDeleteThanks bro Janus! not much views count for this kit...it has a very small fan base I guess. But this is now my fav build so far. ;)
ReplyDeleteYou make diorama with nokia added.. superb.. LoL
ReplyDelete