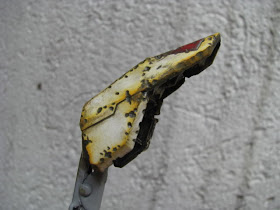
Hello guys, here is a fast way to weather your kits and meet deadlines...there are a lot of ways to weather your kits, some do the hairspray+salt technique, some do drybrushing and a few with AB...I have not tried the hairspray technique yet, I do drybrushing sometimes and have weathered with my AB for dust and soot effects...but here I will show you the fastest I think, which is using Tamiya enamels and Tamiya weathering sets...
Here is a pic of a weathering master set...
FIRST, I did battle damage to the piece with my U-type hasegawa chisel...I think I overdid it though, coz I enjoyed using the chisel so much...Then paint the damages with gundam marker ( black )...I think brown is better or gray, but opted for black thinking that it would look older coz the concept is that the battle damage effects should look like 12 years old...
SECOND, I gave it a nice enamel wash of Tamiya Khaki...
THIRD, another enamel wash of Tamiya flat brown...I dillute my enamels with ZIPPO lighter fluid in 30:70 ratio...30 % enamel paint of course and soon after a very dilluted ( 10:90 ) enamel wash of flat black...
Looks ok now, but I want to put some color to it, so I added a nice rust colored effect with my weathering master...just apply the weathering like pastels or make up...here is how it looks like now ( honestly I overdid it again )...
This is the shoulder of the MG Freedom in my " The Graveyard " diorama...here is how it looks right now...
HERE is the link of how it looks like before the being mounted to the " the graveyard " diorama:


This is a very good tutorial!That zippo to enamel paint ratio is very helpful for me. Thanks for sharing. Now I know how to use those weathering sets!
ReplyDeleteGlad you liked it bro...thanks!
ReplyDeleteThis is a very good tutorial!That zippo to enamel paint ratio is very helpful for me. Thanks for sharing. Now I know how to use those weathering sets!
ReplyDelete