UPDATE 11-15-09 : snapfitted
Hello guys I have snapfitted this kit a couple of days ago and I must say I enjoyed it very much. I plan to give it a custom camo pattern that would resemble a whale skin, but more graphic of course...shades of blues and white is the basic idea for the color scheme.
I have been debating with myself whether I would do the mesh - exposed internal mods that I did with my Dom's leg armors to this kit...however I realize that beeing an underwater mech that it should have a submarine very solid look with NO exposed internal parts. oh well, I plan this build to be a warm up build before I do a Jupiter Ghost Dom and just be a AB practice kit. But then again, I always, almost never do it OOTB.
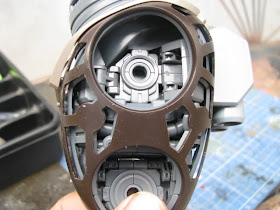
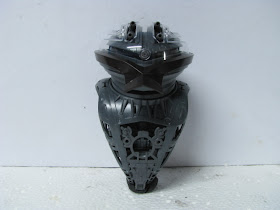
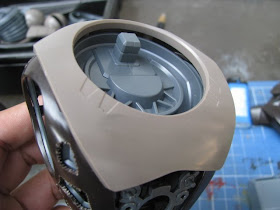
Here are some pictures of the box, internals and the whole kit.
Oooops, that is my 3 year old daughter's foot...Samantha's foot.
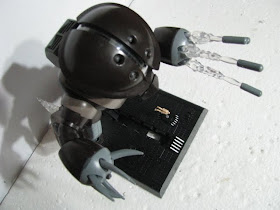
You see that the internals are so nice that is why I am itchy to expose them much like what I did with the Dom leg armor parts...but then again, hopefully I resist the temptation and just scribe panel lines or whatever simple techniques to detail up this kit without exposing the internals. Anyways here are some pics fully assemble and mounted on it's custom base.
UPDATE 11-16-09 : working with the base and the backpack
Hello guys, just a quick update...I like the base that came with the kit, plus it gives the acguy a nice final action pose that is adjustable...but, I like to give it more character, so I added an underwater landscape around the sides to give it more weight and character. First, I super glued pieces of scrap 1 mm pla plates around the sides to serve as an anchor for the clay. Then, I put clay on top and my Glue + sand mixture. It is still curing right now, but I will give it another layer of glue + sand mixture soon...the added layer will create a nice solid crust so that the clay would not deform.
I don't plan to superdetail this build ( though I usually do overdetail as I go along the build ), and I like the kit so much, the only thing bothering me is the small backpack...it is so small in relation to the acguy's body to the extent that it looks funny and " Dora " like....so I decided to build a simple backpack for the acguy and make it look more serious ( hopefully )...here are some initial pics...
UPDATE 11-18-09 : starting the initial mods
Hello guys I am starting the initial mods on the armor parts...this is justa quick update on how I plan to go with the mods...my right hand aches already due to the pressure of doing these mods again...same modding I did with the Dom leg armor parts...However the Acguy being an underwater type...I plan to put clear pla plates under the exposed armor instead of the mesh that I usually put with this kind of mod. I think putting clear pla plate will give it a submarine underwater look even more.
Also, I have here a pic of the base with my Glue + sand misture dried and ready for primer and airbrushing...
UPDATE 11-23-09: initial mods on the acguy armor...
Hello guys, this is just a quick update on this build...I managed to expose the internals of the acguy by removing some armor parts, will need to clean this up and do pla plating and scribe some panel lines. However, a PG Zeta commision work has arrived yesterday, so I will need to set this build aside first and start working on the PG Zeta as soon as I finish my HGUC Zaku diorama...Anyways here are some pics...
The base is primed with Flat Black but I got lazy to set up my AB, thus it will also be set aside for now...
Everything is packed in it's box and will wait until I finished my PG Zeta commission work...
UPDATE 12-04-09 : Color Scheme...
Hello Guys, I designed a color scheme for this build today...However, I just can't make the photo flat or matte in photoshop, thus I ended up with a very metallic and glossy looking finish...originally I wanted it flat with an organic water looking camo...but I like how it came out, besides I still don't have a gloss finished gunpla until now. PLUS, I will enter this in our Zero G Pinoy GB which has a requirement that this kit should have a clean finish...I will still do studies of a matte/flat version of this soon, as long as I find a perfect photograph that aint this glossy. But a glossy finish for an underwater mech sure looks nice...
here is the original color scheme
( pictures taken from dalong.net )AND here is the custom scheme with a glossy metallic finish
and still with a light organic camo...
UPDATE 12-12-09 : more initial mods...more holes to clean up...
Hello guys, I managed to squeeze in a couple of hours to do mods on the Acguy....I just added holes on the bare chest part and the backpack...I am still thinking if I am going to continue with the SB backpack...but I like how the holes are exposing the detailed internals...more holes...more clean up work though...anyways here are the pics...
The chest part prior to modding...it is so darn bare...
Looks better after exposing the internals...a lot better, I think...


The small uninteresting backpack...

the internal of the backpack is really nice...

I also bore holes the backpack to expose the nice internals...a bit more clean up is needed, but it definitely looks better than in ootb form.

Some pics, showing the body part...the left side is still very rough...

but this side is almost done...notice that more internals are shown as I clean up the holes...the holes gets bigger as I scrape off the excess...looking really good to me...


Ello guys, this build is finished...you can continue browsing through the WIP posts or you can visit the gallery of my MG Acguy here...
Thanks for viewing! ;)


I feel like a stalker but your work is really inspiring man :D I saw your works on BAKUC and figure fm ^^
ReplyDeletehahaha...thanks a ton Chris! hehehe
ReplyDeletei wish i can make mine like this..you really make a good job man..xD
ReplyDelete